Summer nail trends are here, and this year, it’s all about playing with texture, subtle art, and pops of color that feel fresh without being over-the-top. Think milky bases, abstract swirls, and a touch of sparkle. We’ve rounded up 30 manicures right off your Pinterest boards, covering everything from whimsical cottagecore to edgy glam. Get ready to swap out those heavy winter shades for something light and fun, whether you’re a gel loyalist or a press-on devotee.
We have 30 ideas for you today.
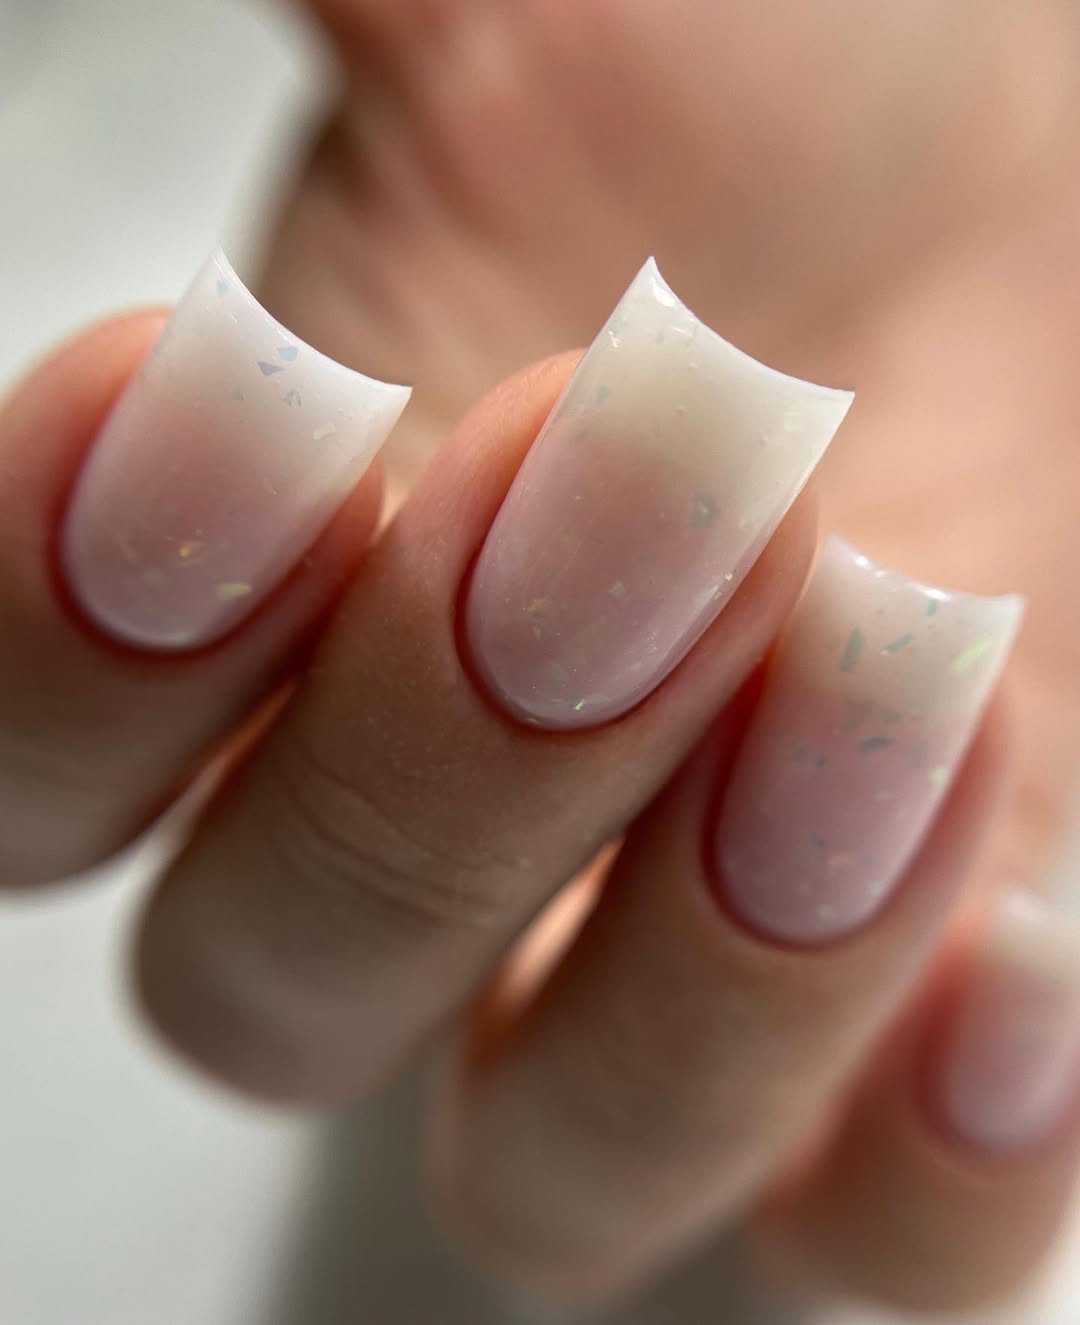
1. Clean Girl Milky Pink Square French Tips
The “clean girl” aesthetic isn’t just for makeup anymore, it’s totally taken over nails. This milky pink base with crisp square French tips is the epitome of that chic, understated vibe that’s all over TikTok right now. It’s sophisticated without trying too hard, making it a perfect everyday mani that still feels elevated enough for special occasions. It’s got staying power, unlike some of the more fleeting trends we’re seeing.
The secret to this look is finding that perfect sheer milky pink. It needs to be translucent enough to let your natural nail show through a bit, but still pigmented enough to give that soft, diffused pink hue. This isn’t a solid opaque polish; it’s all about that subtle wash of color.
2. Berry Swirl Watercolor Gold Flake Square Nails
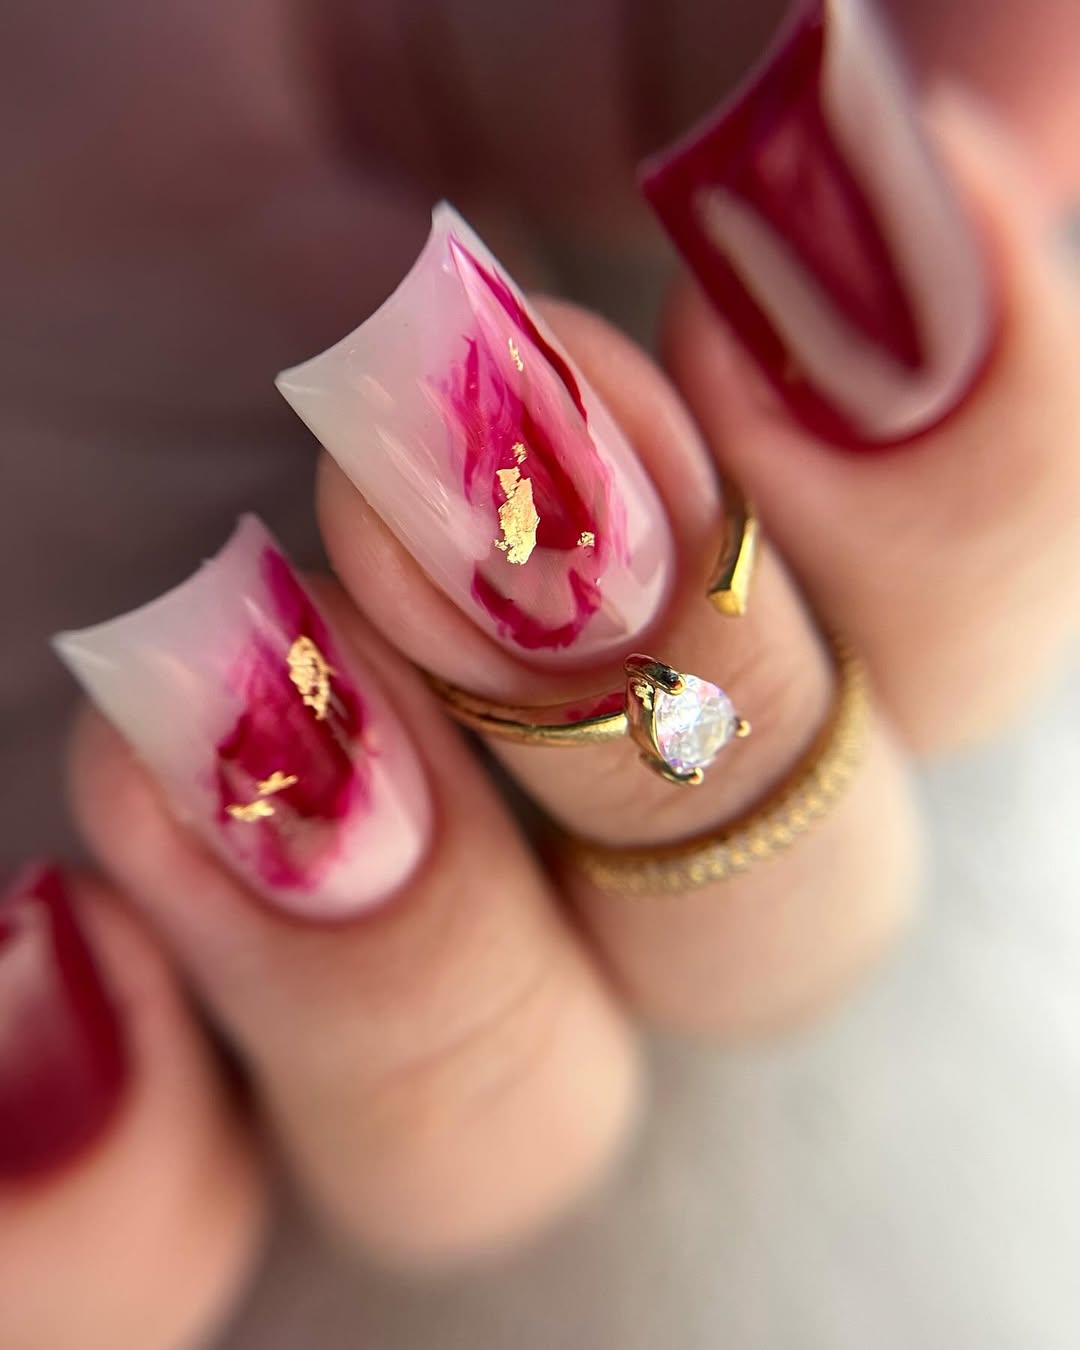
Getting that delicate watercolor swirl effect with gold flakes is easier than it looks! Here’s a quick rundown:
- Apply a milky nude base coat and cure for 60 seconds.
- Using a fine detail brush, dab small dots of berry and white gel polish onto the nail, not curing yet.
- Gently swirl the colors together with the brush, creating a marble effect. Cure for 30 seconds.
- While still tacky, lightly press gold flakes onto the swirled areas. Cure again for 60 seconds.
- Finish with a glossy top coat and cure for 60 seconds.
If you’re using gel, be mindful of how much pigment you’re swirling. Too much can make the design look muddy rather than ethereal. Also, make sure your gold flakes are thin; thicker pieces can catch and lift the top coat prematurely, leading to chips around the edges.
3. Garden Fresh Ladybug Almond French Tips
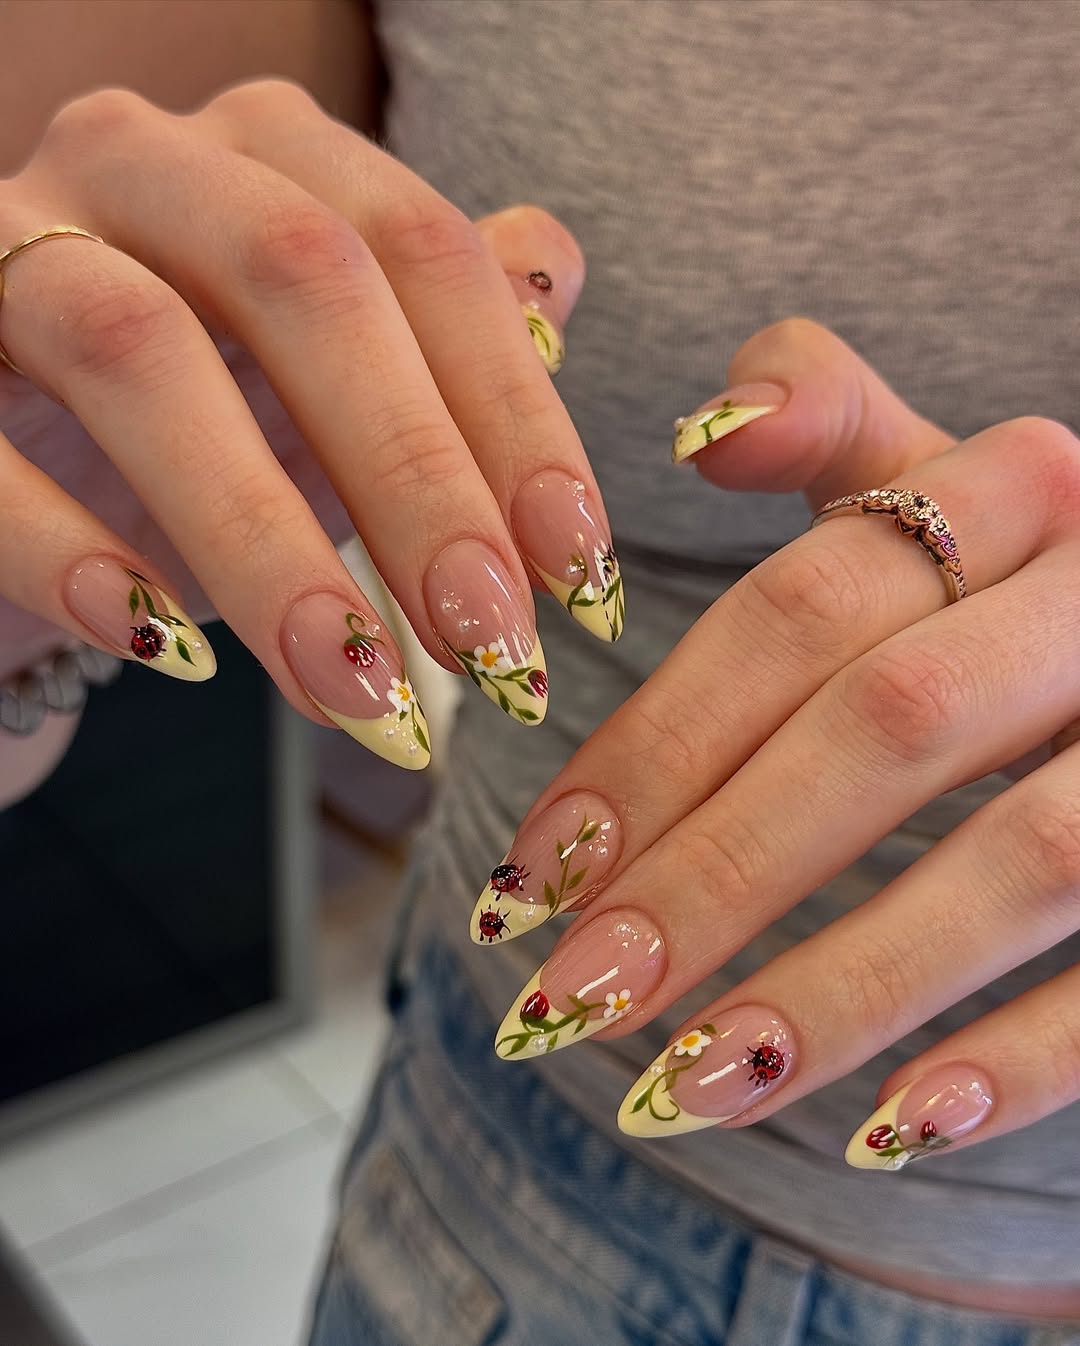
This whimsical cottagecore mani is perfect for summer garden parties, outdoor weddings, or a lovely picnic in the park. The almond shape and medium length mean it’s still practical for daily tasks, but the fun ladybug and floral art add a playful touch. It’s definitely a conversation starter without being too loud, fitting perfectly with sundresses and breezy fabrics.
While the design is adorable, intricate nail art like this might show regrowth a bit more quickly than a solid color, especially if your nails grow fast. Expect to see the growth line around the cuticles after about a week with gel. For regular polish, you might need a refresh or touch-up on the tips every 3-4 days to keep it looking crisp.
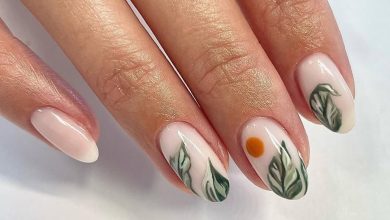
4. Soft Yellow Floral Gold Accents Short Oval Nails
This short, round shape with a neutral, sheer peach shade is incredibly versatile. It flatters almost every nail bed shape, especially those with wider nail beds, as the rounded edges create an elongating effect. For skin tones, this sheer peach reads as a subtle glow on warmer undertones, a true peachy-nude on neutral undertones, and offers a lovely contrast against cooler undertones without looking too stark.
For a similar sheer peach without breaking the bank, check out Essie’s “Mademoiselle” or Sally Hansen’s Color Therapy in “Blush Stem.” Both offer that delicate, barely-there peach tint that’s perfect for a clean and understated look.
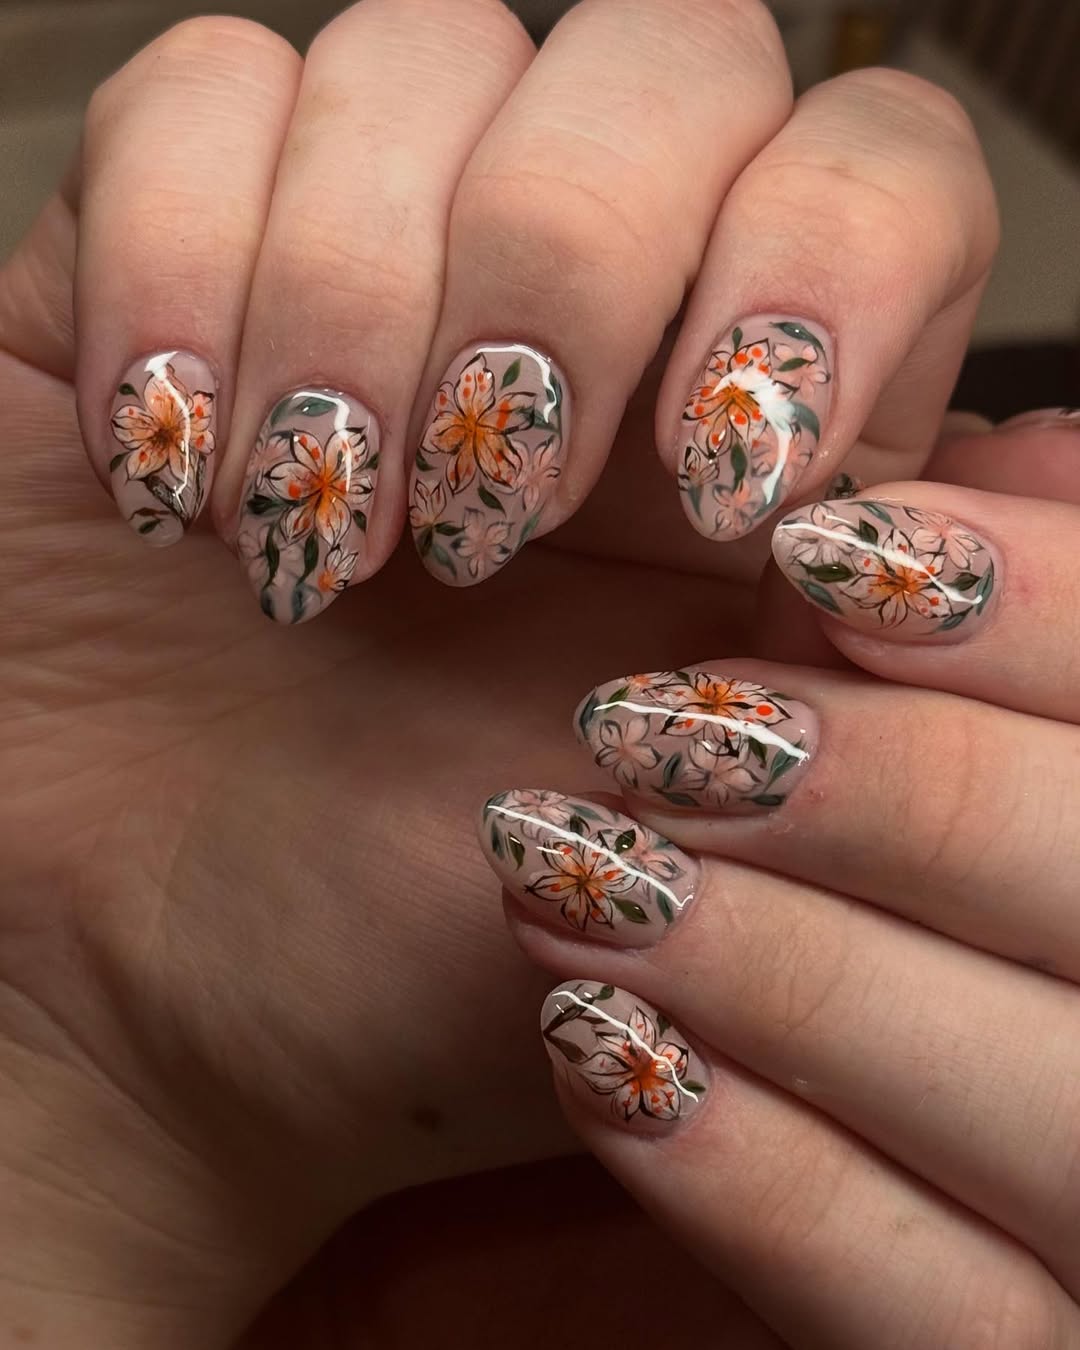
5. Vibrant Floral Overlay Glossy Oval Nails
- Base Coat: OPI Gel Base Coat (approx. $15)
- Sheer Nude Gel Polish: Beetles Gel Polish in “Nude Beige” (part of a set, approx. $18 for 6 colors)
- Orange Gel Polish for flowers: Modelones Gel Polish in “Sunshine Orange” (approx. $7)
- Green Gel Polish for leaves: Modelones Gel Polish in “Grass Green” (approx. $7)
- Striping Brush: Makartt Nail Art Brushes (set of 3, approx. $10)
- Top Coat: AIMEILI No Wipe Top Coat (approx. $10)
- 48W LED Lamp: SUNUV UV LED Nail Lamp (approx. $35)
Before you dive into this dainty floral design, make sure your nail plate is perfectly prepped. Gently push back your cuticles and clean up any non-living tissue. Dehydrate the nail surface with rubbing alcohol or a nail dehydrator to ensure proper adhesion. A gentle buffing of the natural nail with a 240-grit buffer can also help adhesion, creating a slightly textured surface for your base coat to grip onto.
6. Dreamy Lavender Glitter Square Ombré Nails
Glitter ombré manicures, especially with gel, tend to have a pretty good wear time, usually around 10-14 days before significant regrowth becomes noticeable or chips might start to appear at the free edge. The gradient hides minor imperfections well, and the glitter itself acts as a bit of a camouflage for any tiny scratches or dulling of the top coat. Because it’s gel, it will need to be soaked off properly to avoid damaging your natural nails.
Be careful during application to avoid pooling gel at the cuticles, especially with glitter polish. If gel settles there and isn’t cured properly, it can lead to lifting issues that shorten the life of your manicure. Also, the glitter can sometimes feel a little bulky if too many layers are applied, so keep those coats thin and cure thoroughly.
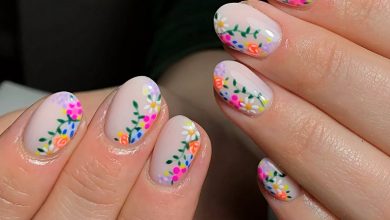
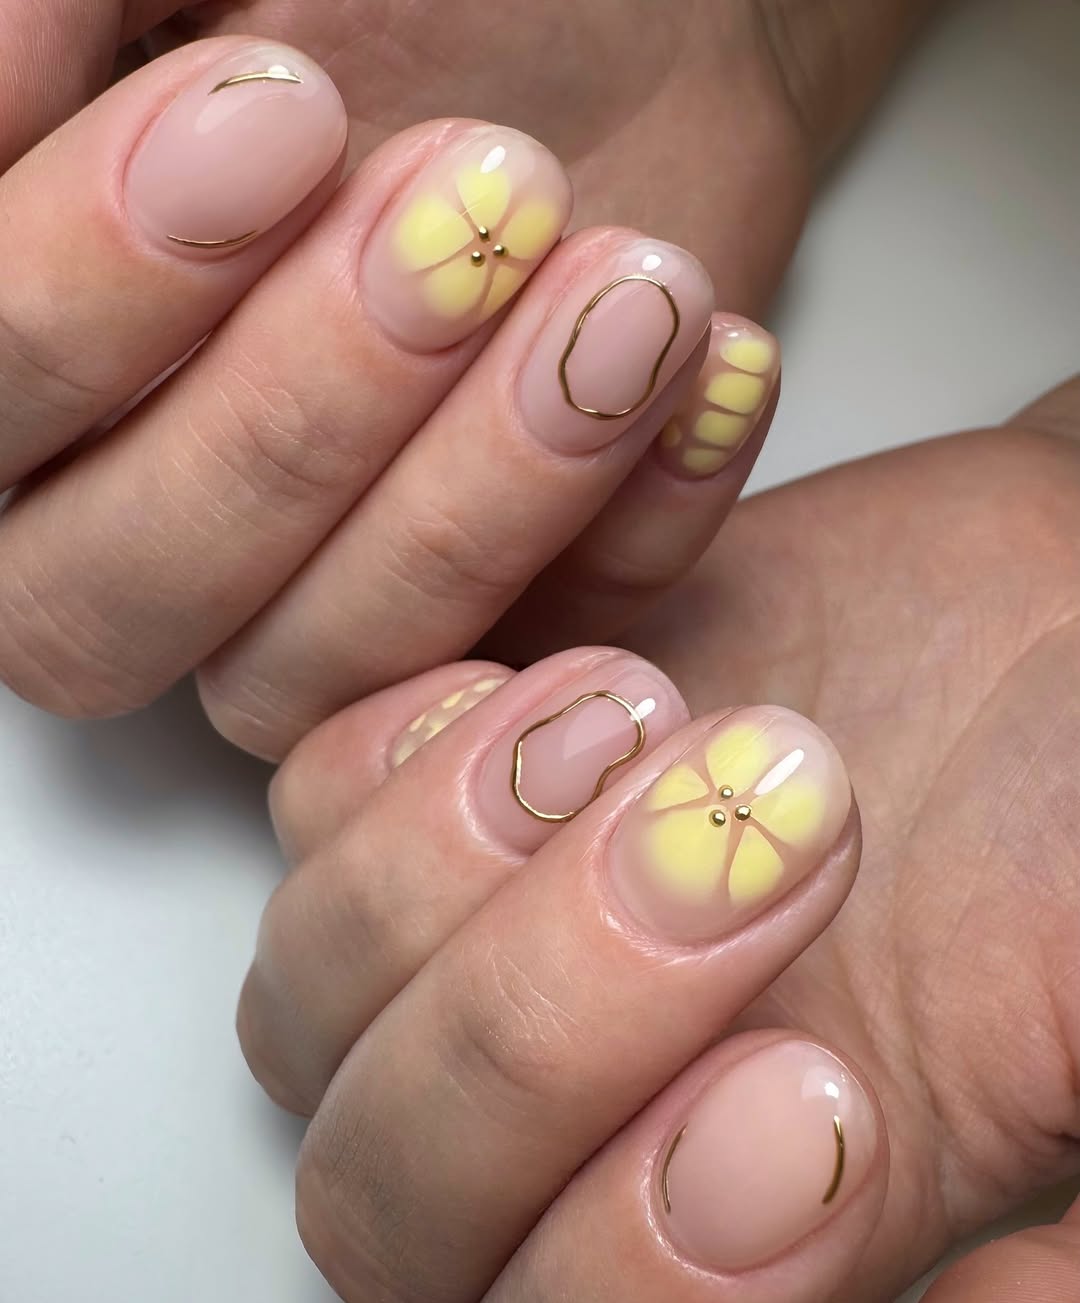
7. Playful Pastel Yellow Floral and Abstract Short Round Nails
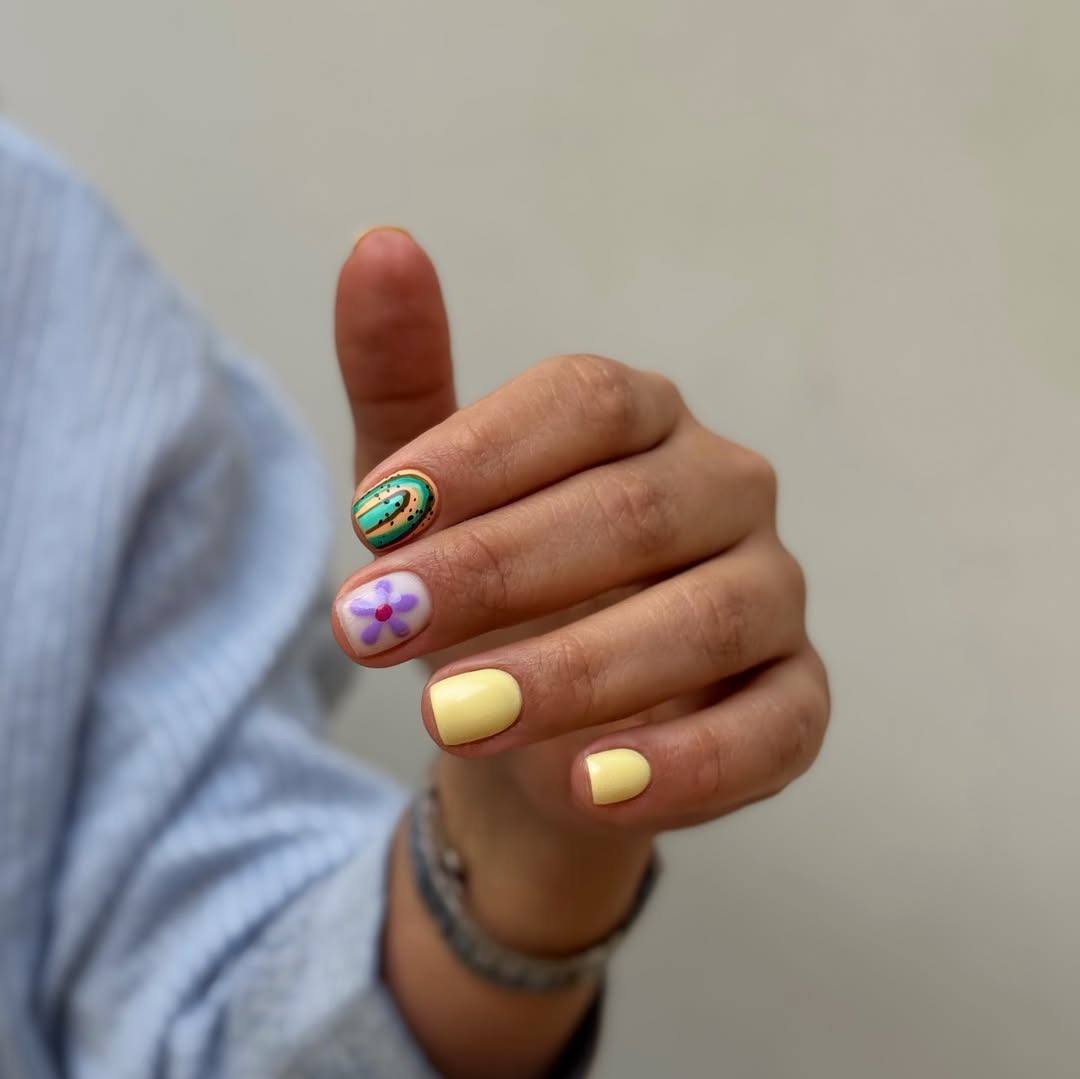
Short, round nails are universally flattering, making fingers appear longer and more slender, even on wider nail beds. The pastel yellow with playful floral and abstract art really pops on warm and neutral undertones, bringing out a sunkissed glow. If you have cooler undertones, a slightly cooler-toned pastel yellow, or even a soft lemon chiffon shade, would be incredibly complimentary.
Playful, mismatched nail art like this has been making waves on Pinterest, often paired with bright, whimsical fashion. It’s a fresh take on summer nails that moves away from strictly minimalist designs, showing off a more artistic and free-spirited vibe that feels perfectly in tune with festival season or a fun beach holiday. Look up Betina Goldstein for some similar inspiration.
8. Milk Bath Yellow Long Square Nails
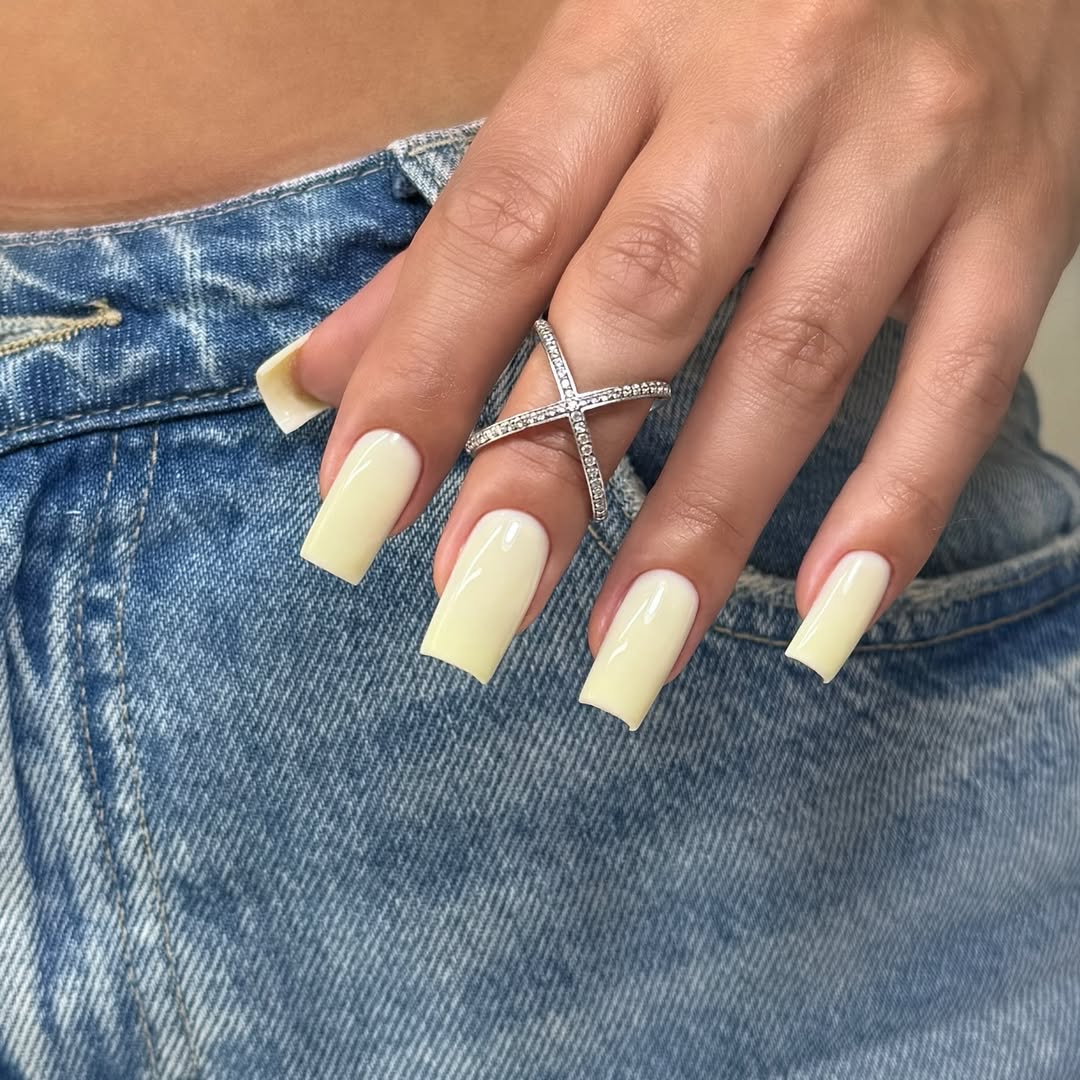
Achieving that milky translucence for a “milk bath” effect is all about layering. Here’s how:
- Apply a thin layer of milky white gel polish as your base. Cure for 30 seconds.
- Apply a thin coat of a sheer pastel yellow gel polish. Don’t cure.
- Immediately apply another thin layer of the milky white gel polish over the yellow.
- Gently swirl the two layers with a clean brush to create a diffused, translucent blend. Cure for 60 seconds.
- Repeat steps 2-4 if you want more opacity, curing each time.
- Finish with a glossy top coat and cure for 60 seconds.
To get a similar subtle, milky yellow effect with regular polish, try layering Essie’s “Ballet Slippers” (a sheer milky pink) underneath ORLY’s “Mellow Yellow” (a pale sheer yellow). The combination creates a softer, more diffused look than a single opaque yellow.
9. Glossy Matcha Green Ombré Oval Nails
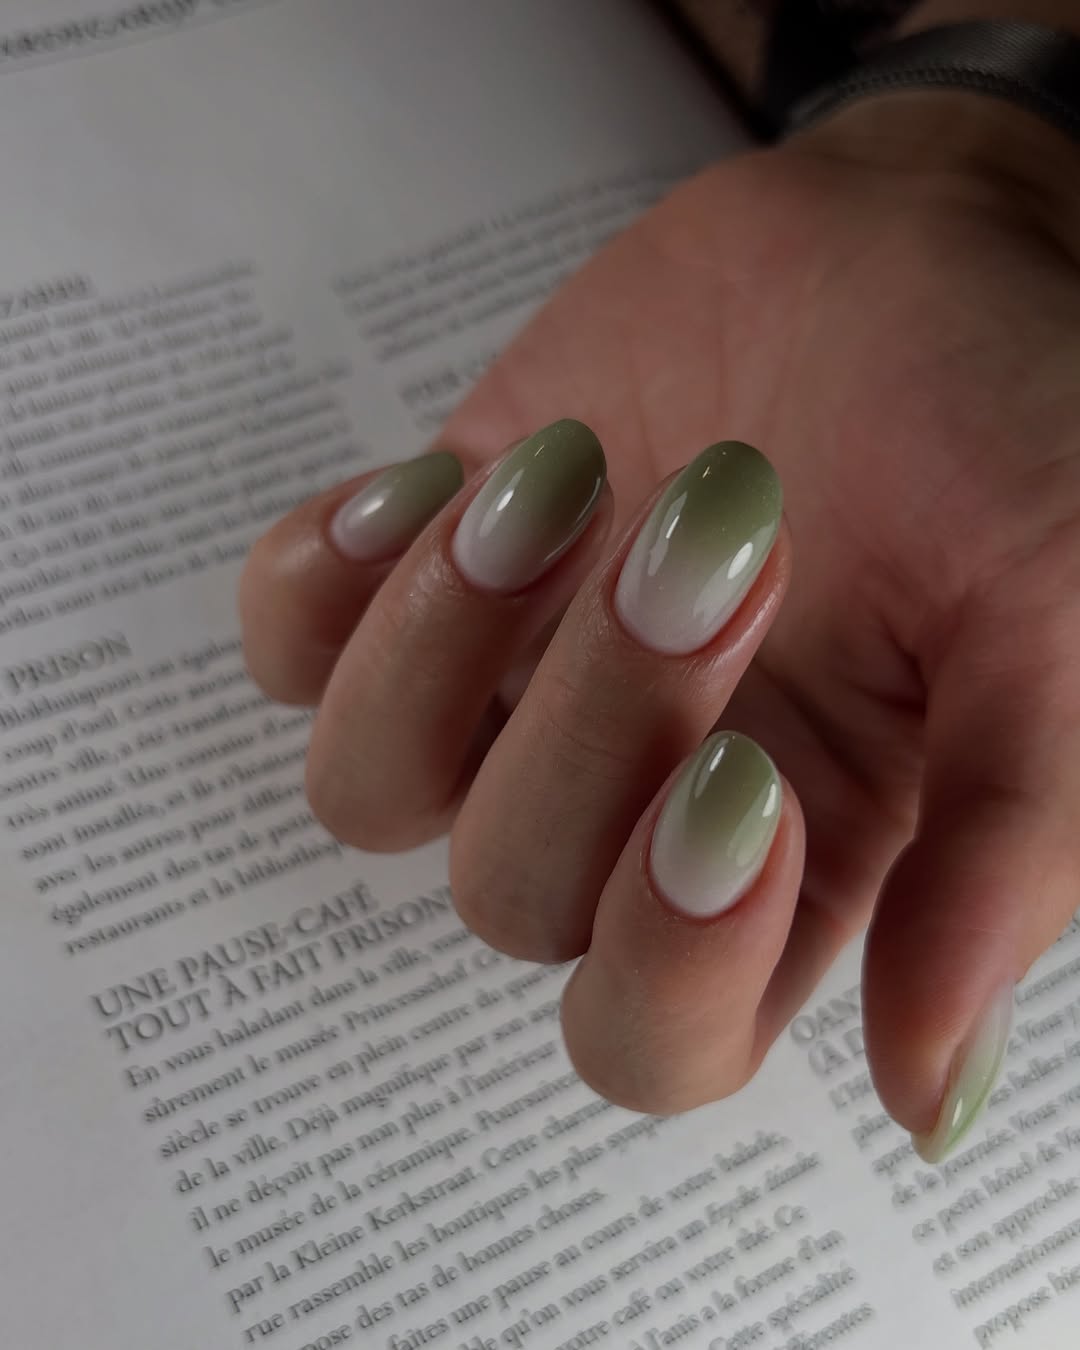
The star of this matcha green ombré is definitely a high-quality sheer milky white gel polish. It creates the perfect diffused base for the matcha green to blend into, giving that soft, almost cloud-like gradient. Without that milky white, the green wouldn’t have the same gentle transition, making the ombré look too harsh or opaque. It’s all about building that translucent, faded effect.
Gel ombrés can sometimes lead to lifting at the cuticle if the product is applied too thickly, especially when blending. Remember to keep the layers thin when building up the gradient, and make sure to cap the free edge with each coat. Also, watch out for potential staining when using darker or more pigmented greens directly on the natural nail; a good base coat is non-negotiable.
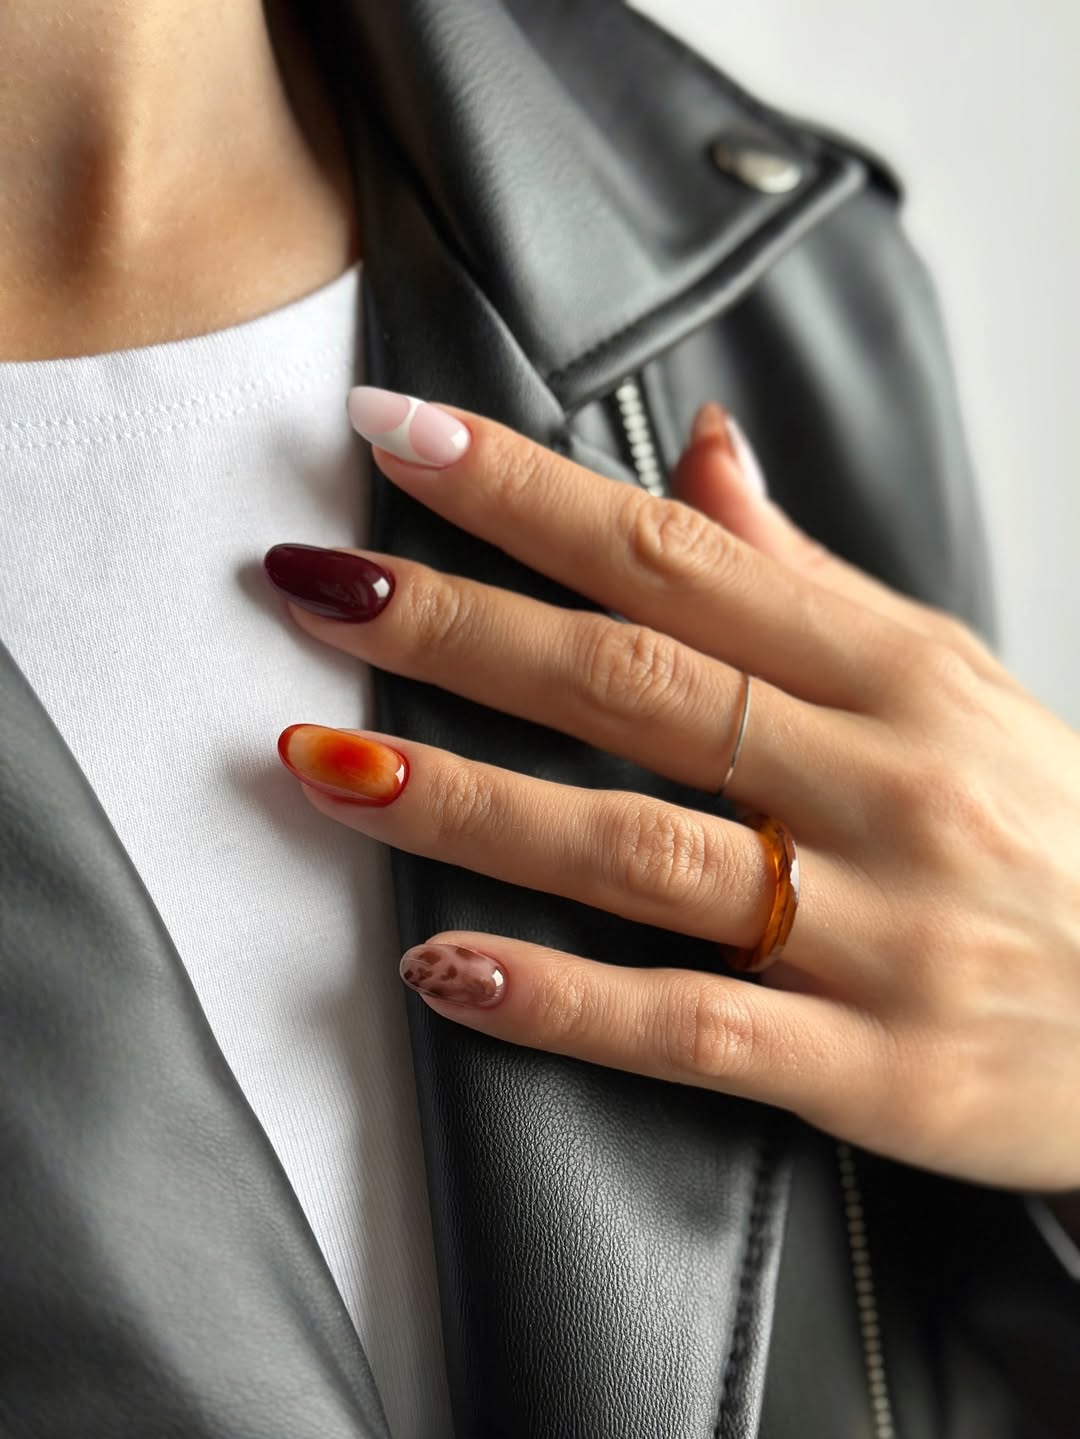
10. Summer Sunset Tortoiseshell Stiletto Nails
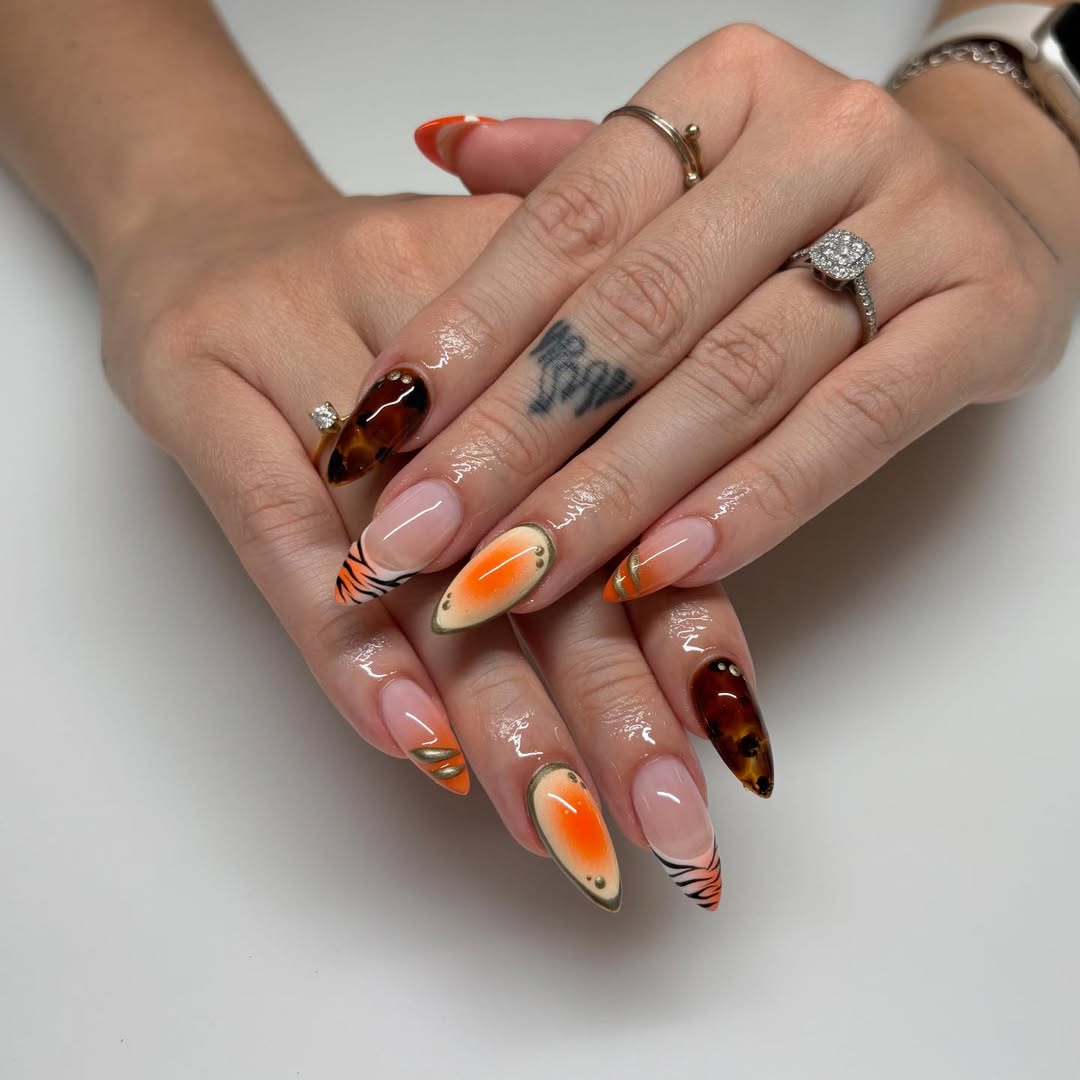
These bold tortoiseshell stiletto nails are definitely a statement! Perfect for a night out, a festival, or any event where you want to turn heads. The stiletto shape, while dramatic and super chic, can be a little challenging for everyday tasks like typing or picking up small objects. It’s probably not the most practical choice for someone working in healthcare or with young children, but for a special occasion, it’s undeniably fierce.
Stiletto nails, especially long ones, are prone to breaking if not properly reinforced, whether with gel or acrylic. If you’re doing this with gel, make sure to use a builder gel or structured gel base to add strength. Expect these to last 2-3 weeks with gel before requiring a fill or a full soak-off, with the main concern being potential snagging and breaking on delicate objects.
11. Whimsical Summer-Themed Glossy Almond Nails
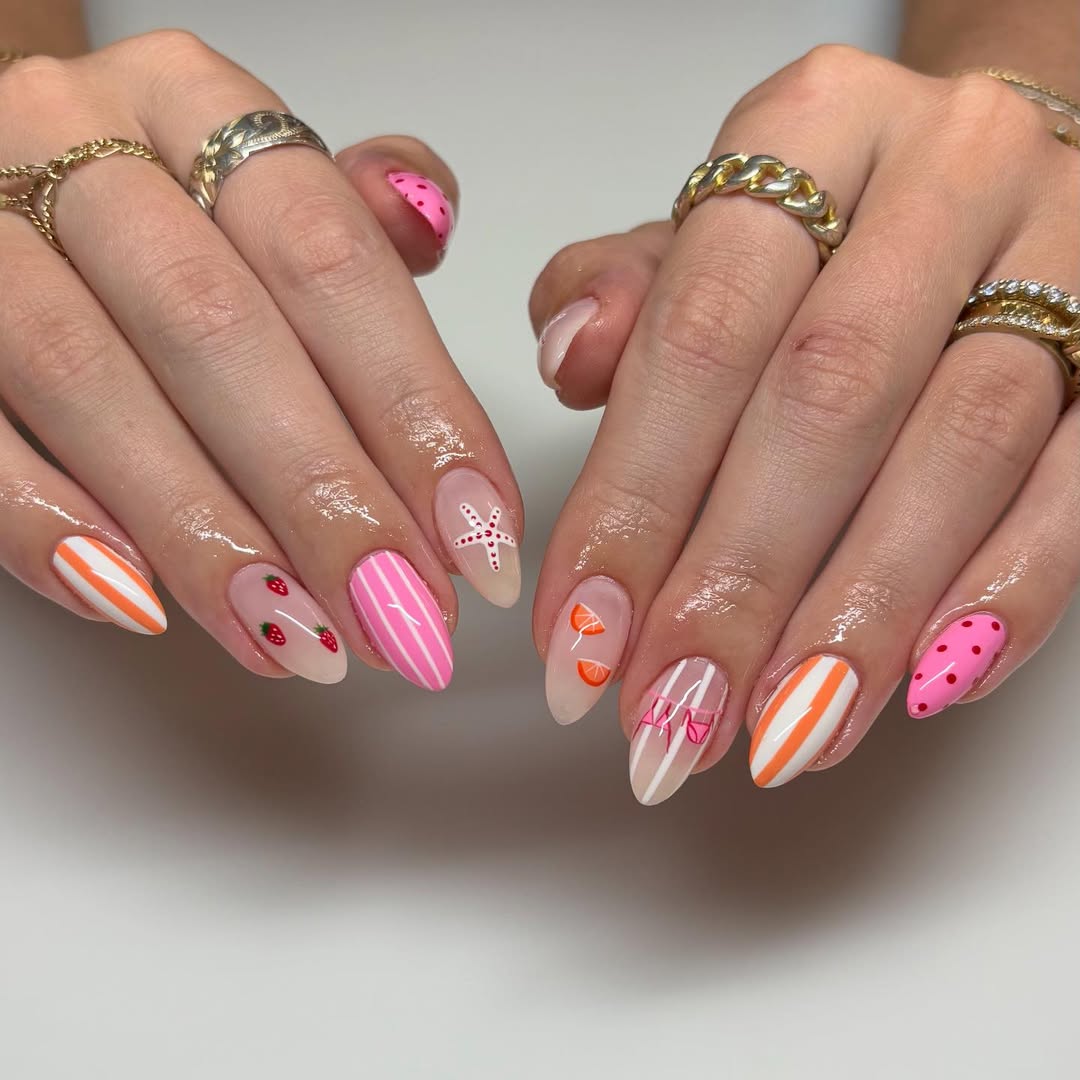
This whimsical summer art fits right in with the current trend of personalized, hand-painted details. It’s less about perfection and more about playful expression, a vibe you see all over Instagram, especially with celebrity manicurists like Naomi Yasuda who embrace quirky designs. These artistic, slightly abstract summer scenes are a refreshing break from super structured looks and resonate with the ‘dopamine dressing’ aesthetic.
The unsung hero here is a really good set of fine-point nail art brushes. You need brushes with excellent control and a sharp tip to get these intricate fruit and stripe details. A striper brush for the lines and a small detail brush for the fruit illustrations will make all the difference in achieving a clean and precise look for those tiny elements.
12. Eclectic Modern Mix and Match Glossy Oval Nails
Oval nails are incredibly elegant and, like the short round shape (as seen in Idea 6), tend to flatter most hand and finger types. This eclectic mix-and-match style with warm, earthy tones particularly complements warm and neutral skin undertones, enhancing a natural glow. If you have cooler undertones, opting for a palette with slightly more muted blues, lavenders, or cool-toned greens in your abstract designs would look equally sophisticated.
When mixing and matching different designs on each nail, consistency in gloss or matte finish is key. If some nails are more heavily textured or have encapsulated elements, ensure your top coat is applied evenly to prevent snagging or uneven wear. Also, darker pigments in abstract art can sometimes lead to superficial staining if you skip a good base coat, so don’t cut corners there!
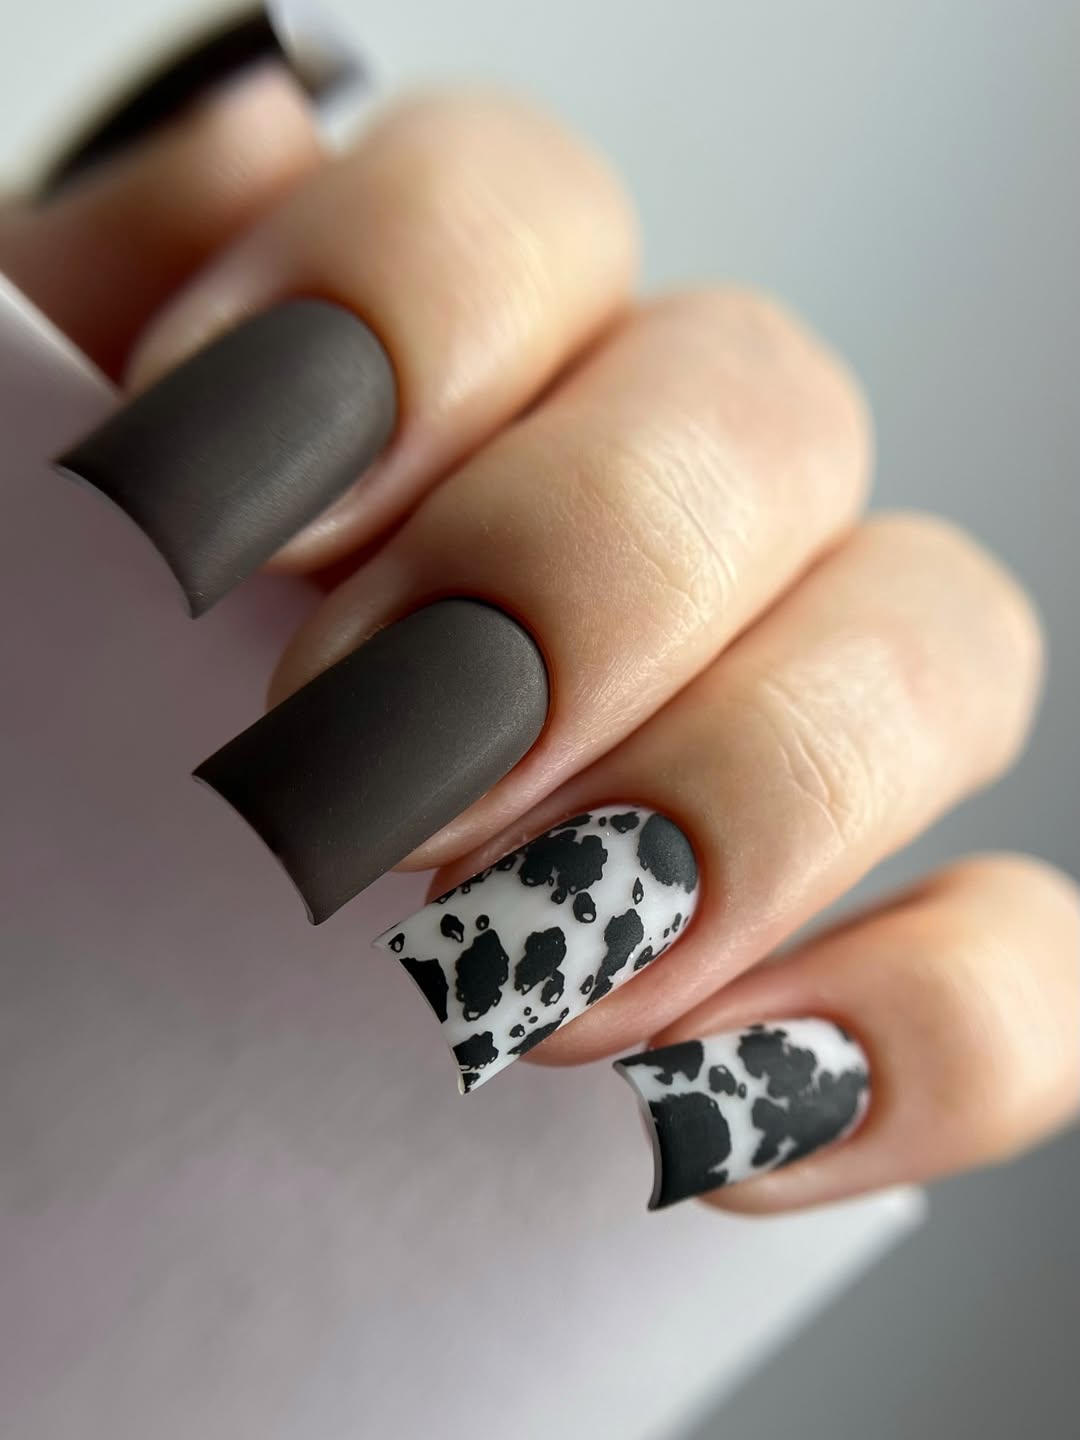
13. Matte Charcoal And Cow Print Coffin Nails
- Base Coat: Orly Bonder Rubberized Basecoat (approx. $13)
- Matte Top Coat: OPI Matte Top Coat (approx. $13)
- Charcoal Gray Gel Polish: Kiara Sky Gel Polish in “Gray Matter” (approx. $12)
- White Gel Polish for Cow Print: Kokoist “Whitey” (approx. $15)
- Black Gel Polish for Cow Print: Kokoist “Blackest Black” (approx. $15)
- Detail Brush: ERUIKA Fine Liner Nail Brush (approx. $8)
- 48W LED Lamp: MelodySusie PRO24W LED Nail Lamp (approx. $40)
Matte finishes, while super chic, tend to show oils and dirt more readily than glossy finishes, so you might find yourself wiping them down more often. With a coffin shape and gel, you’re looking at a solid 2-3 weeks of wear before needing a fill. However, the matte texture can sometimes attract more lint, so keep that in mind if you’re frequently handling fabrics. The cow print, being a distinct pattern, will also show regrowth at the cuticle within 1.5-2 weeks.
14. Whimsical Winnie the Pooh And Bee Nail Art
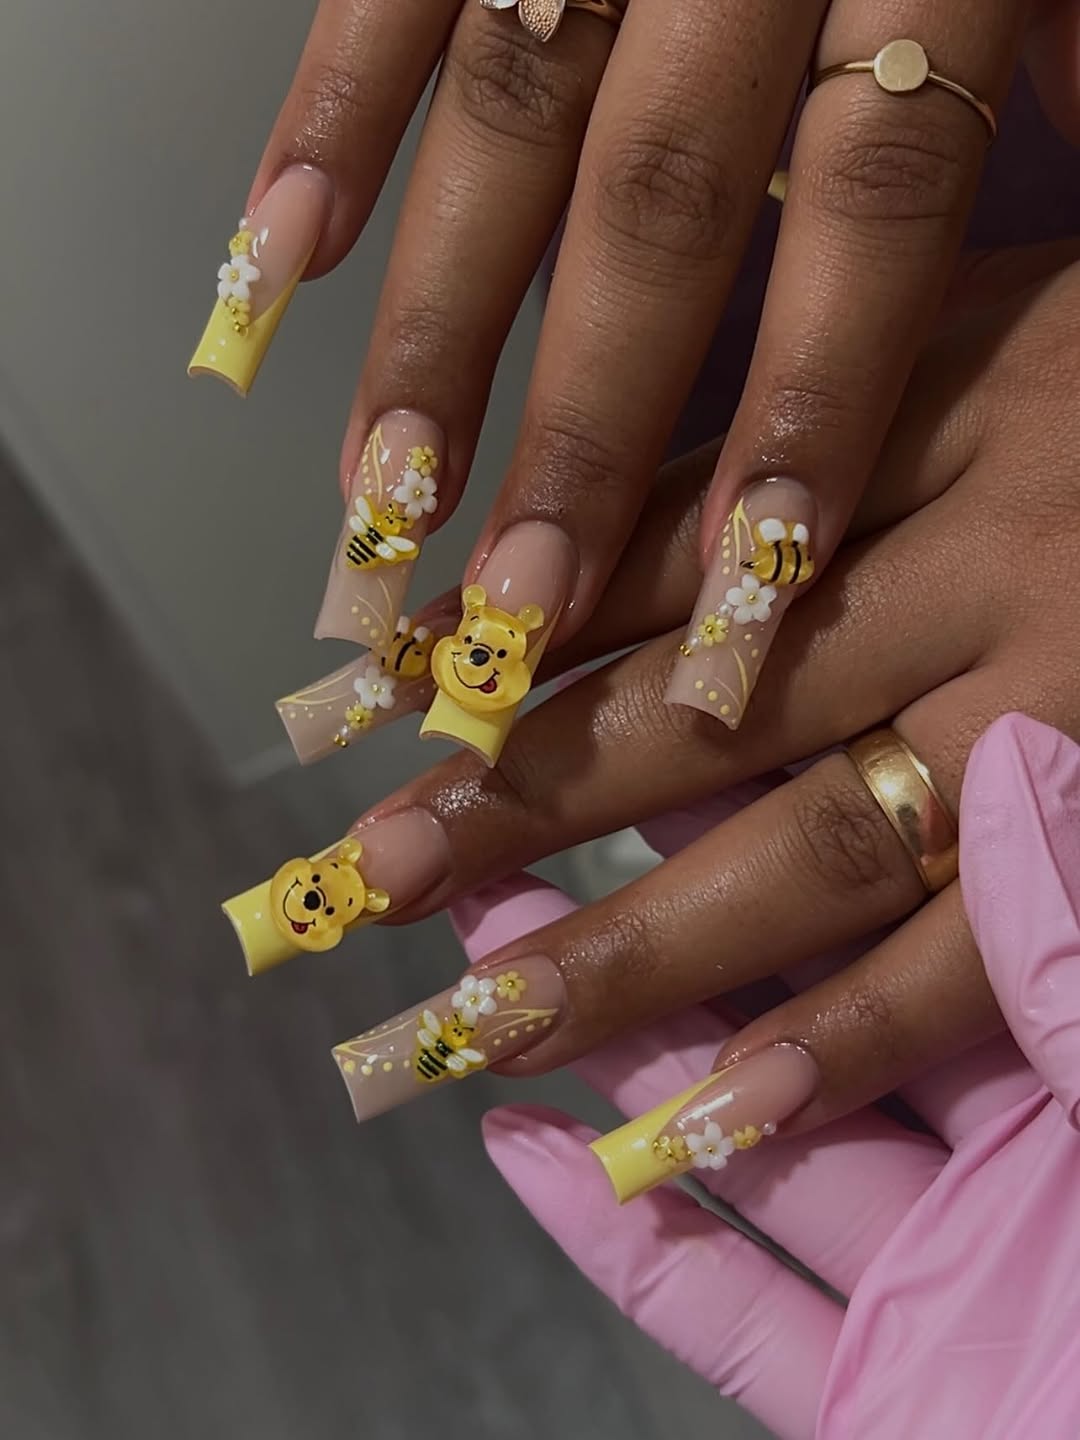
This adorable Winnie the Pooh and bee nail art is absolutely perfect for themed parties, casual weekend wear, or just bringing a smile to your face. It’s a playful choice that feels nostalgic and sweet, making it ideal for anyone who loves a touch of whimsy. Given the long coffin length and 3D elements, it’s best for occasions where extreme dexterity isn’t required – maybe not the best for an intensive crafting session!
The true hero product for this kind of detailed character art is a really good, opaque yellow gel polish for the French tip, and a set of fine detail brushes. You’ll need brushes specifically for painting tiny lines and filling in small shapes to get Pooh’s features and those delicate bees just right. Also, a high-quality 3D gel or acrylic paste is essential for building up those raised elements without them breaking off easily.
15. Glossy Ruby Red Square Short Nails With Rhinestones
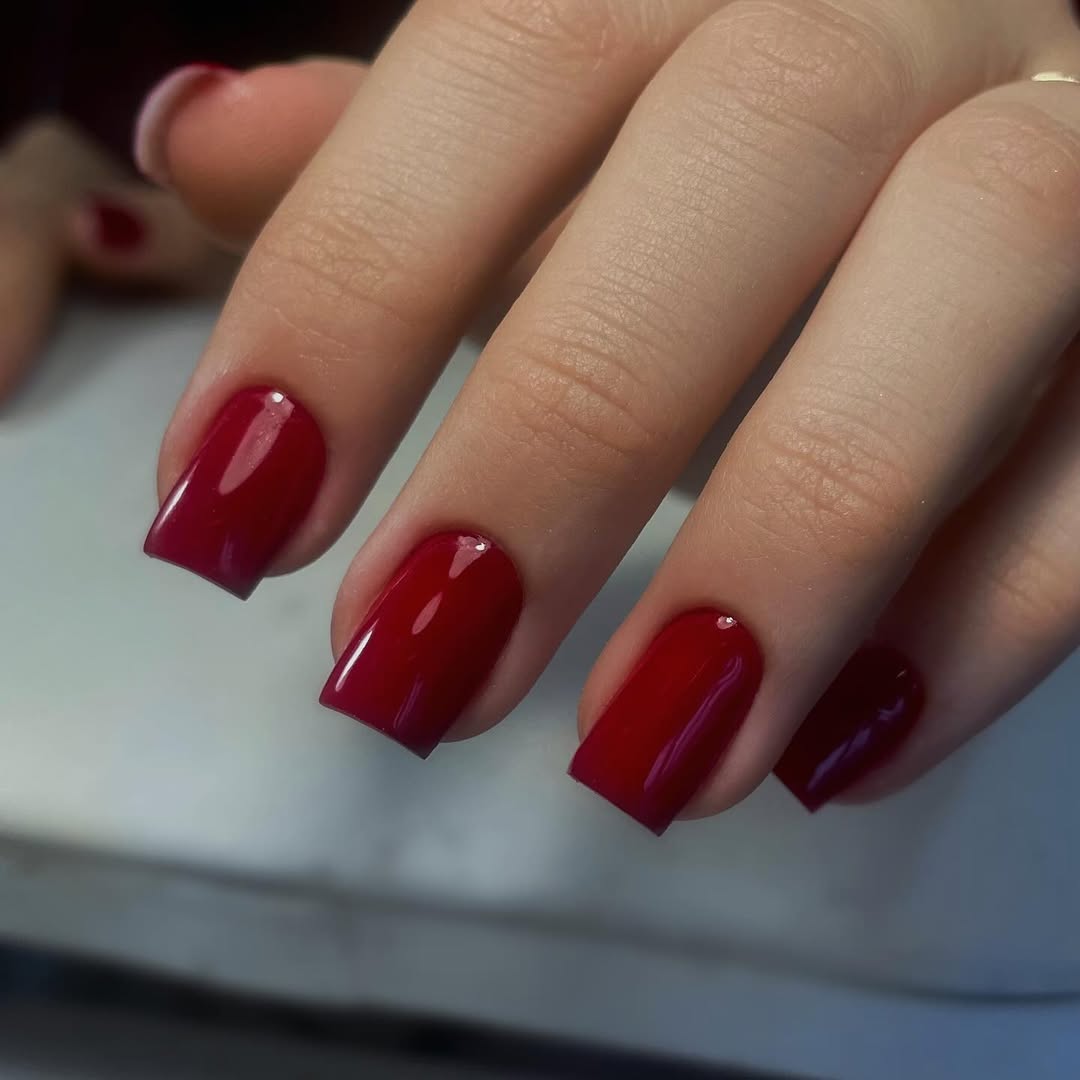
Ruby red nails are an undeniable classic, but the addition of thoughtfully placed rhinestones brings this look squarely into modern glam territory. It’s a nod to the maximalist trend we’re seeing, but in a refined way that makes it feel fresh and appropriate for summer evenings. With shorter square nails, it’s a chic compromise between a bold color and a practical length, echoing subtle luxury seen on red carpets.
For a similar rich ruby red shade in a regular polish, try OPI’s “Big Apple Red” or Essie’s “Really Red.” For the rhinestones, you can find affordable packs on Amazon or at local craft stores—just make sure they’re flat-backed for easier application on the nail plate. Use a strong nail glue or a tiny dab of builder gel to secure them.
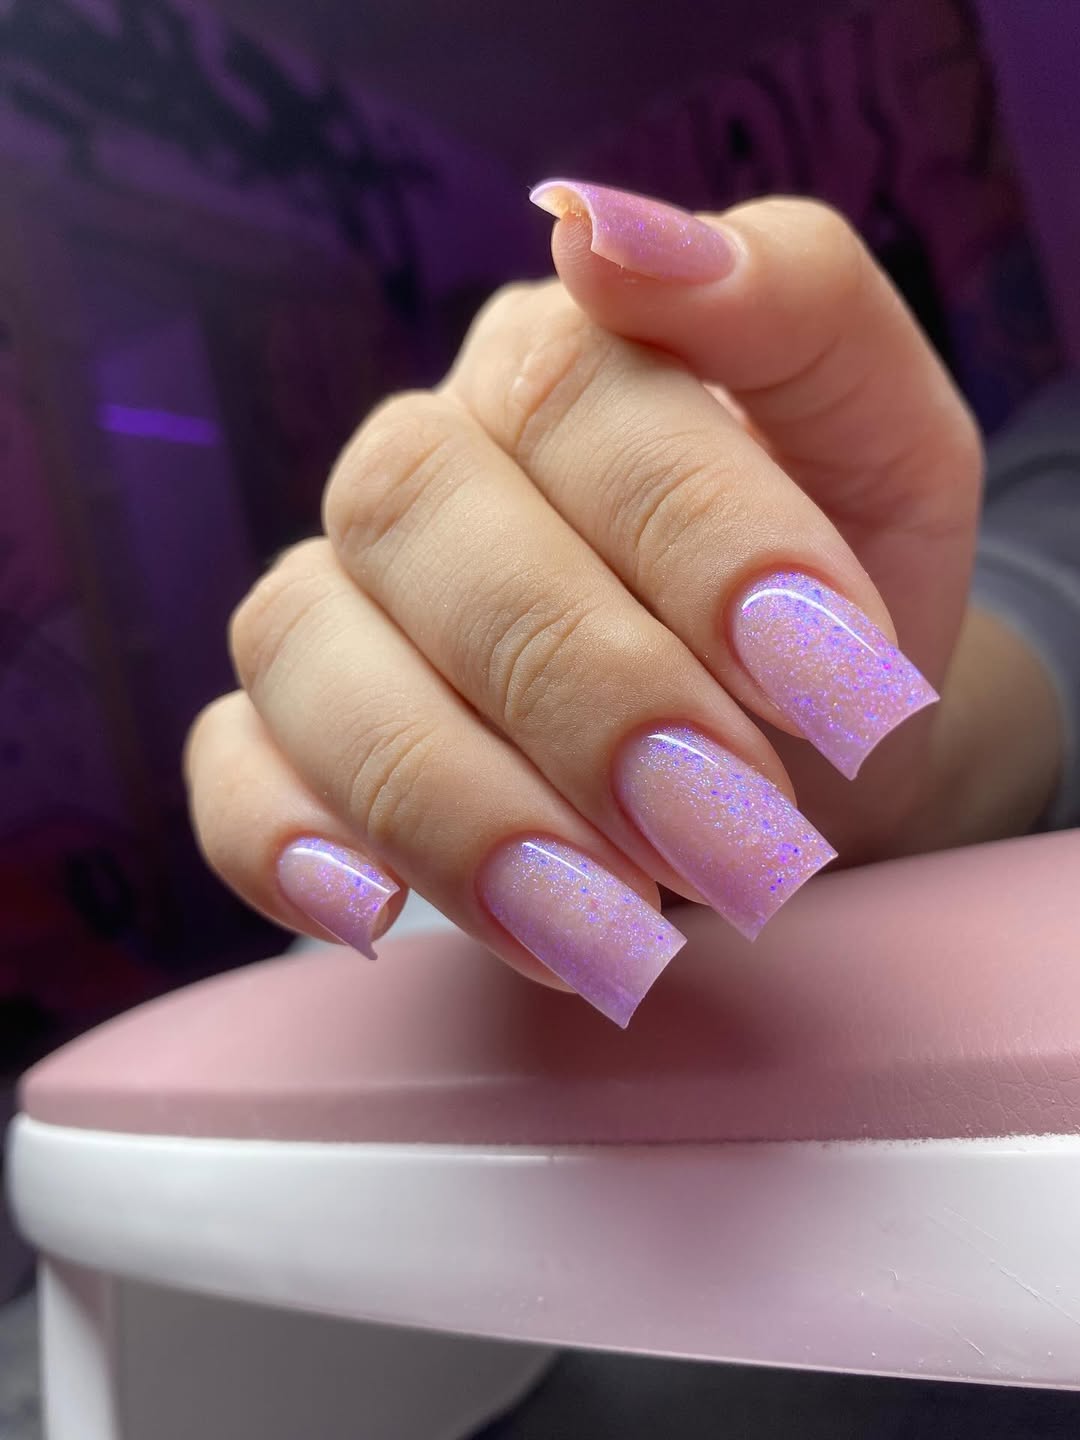
16. Pastel Pink Glitter Square Manicure
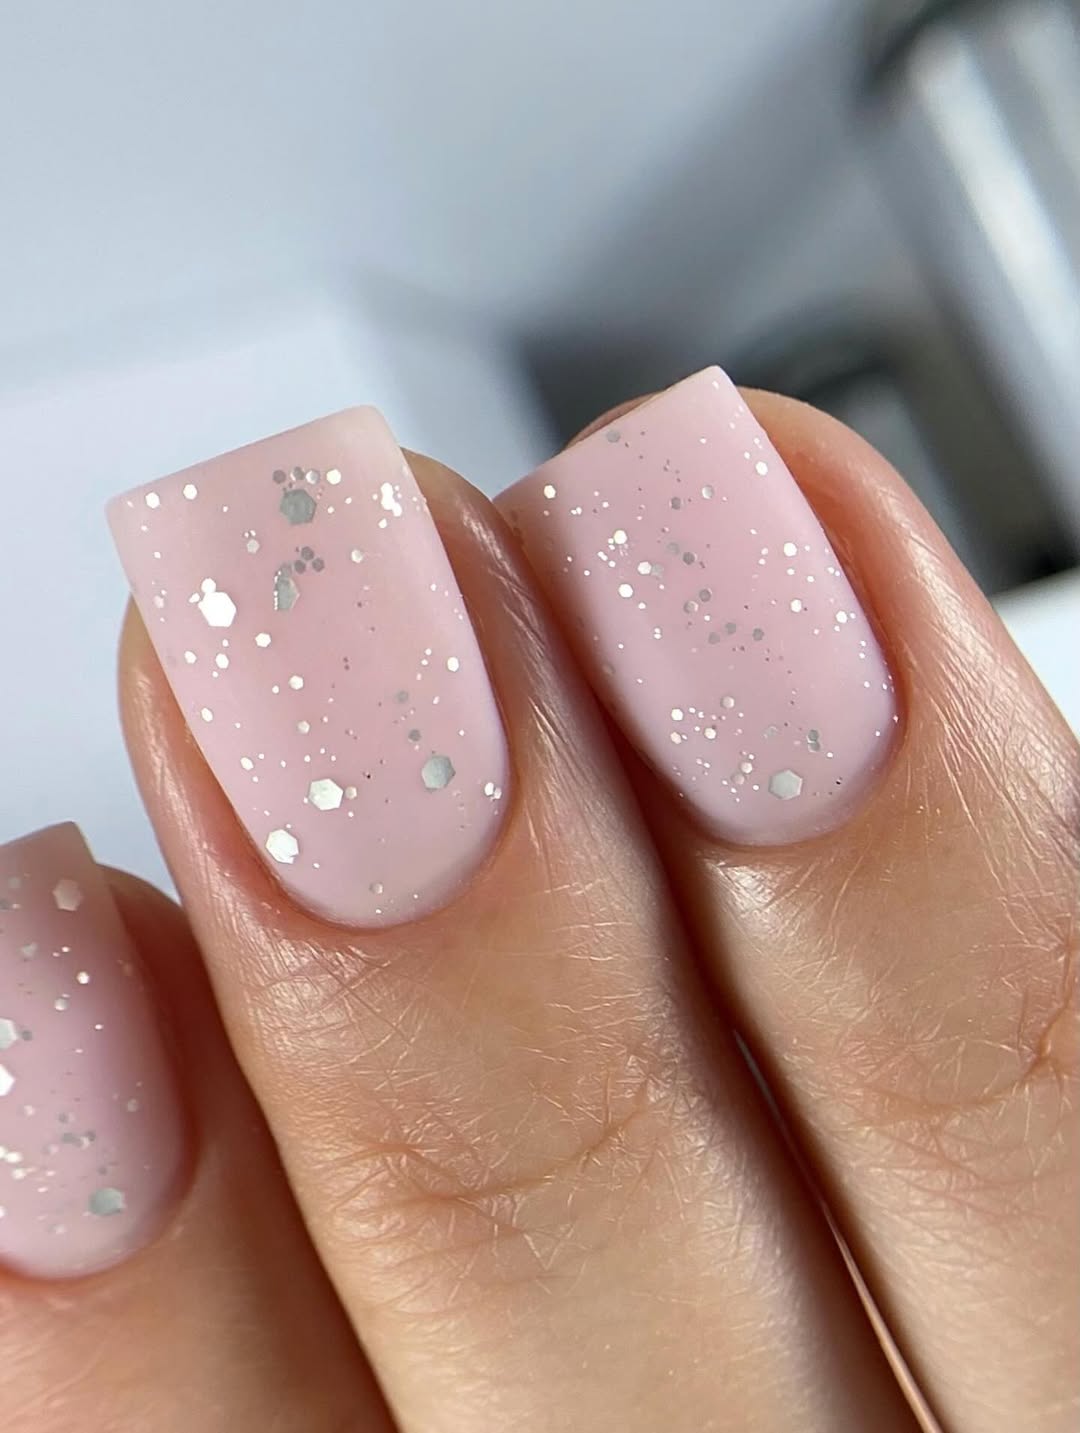
When applying glitter like this, start with a solid base color first, then apply your glitter gel only to the upper two-thirds of the nail, gently fading it down towards the cuticle. This creates a softer ombré effect and prevents a thick, bulky layer of glitter near the cuticle, which can cause lifting. Cure each glitter layer thoroughly to lock in the sparkle and prevent dulling.
Glitter polish, while fun, can sometimes be a pain to remove. Picking it off can severely damage your nail plate, so always opt for a proper soak-off method if it’s gel. Even with regular polish, using the foil method with acetone will be much kinder to your nails than endless scrubbing. Also, ensure your top coat is generous enough to smooth over any glitter texture, preventing snags.
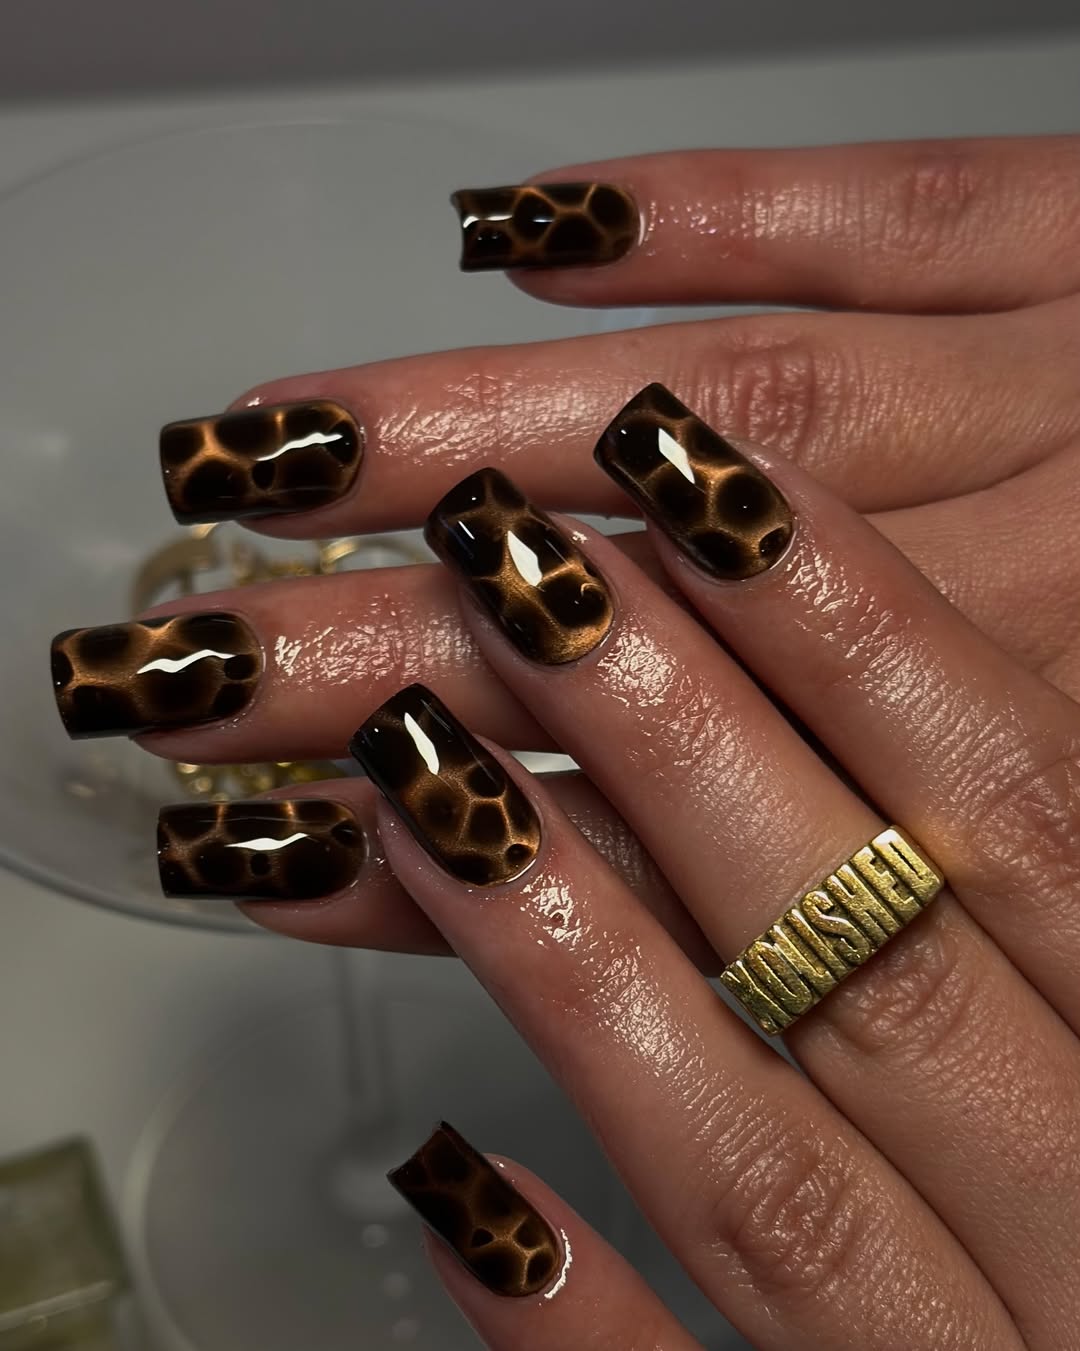
17. Rich Tan and Black Abstract Gel Cat Eye
Creating a crisp cat-eye effect with gel polish requires a specific technique. Here’s a brief:
- Apply a black gel base coat and cure for 60 seconds.
- Apply one thin coat of your cat-eye gel polish (deep tan shimmer). Do NOT cure.
- Immediately hold a strong magnet over the nail for 5-10 seconds, positioning it to create your desired line or pattern.
- Cure the cat-eye gel for 60 seconds WITH THE MAGNET STILL IN PLACE to lock the pigment.
- Apply a second thin coat of cat-eye gel and repeat steps 3 and 4 if you want more intensity.
- Finish with a glossy top coat and cure for 60 seconds.
The true hero product for this look is the cat-eye gel polish itself. It contains tiny metallic particles that respond to a magnet, allowing you to create that distinct shimmery line. A good quality cat-eye gel will have highly responsive particles that move easily and hold their position well once cured.
18. Blue Wavy Lines Ombre Oval Nails
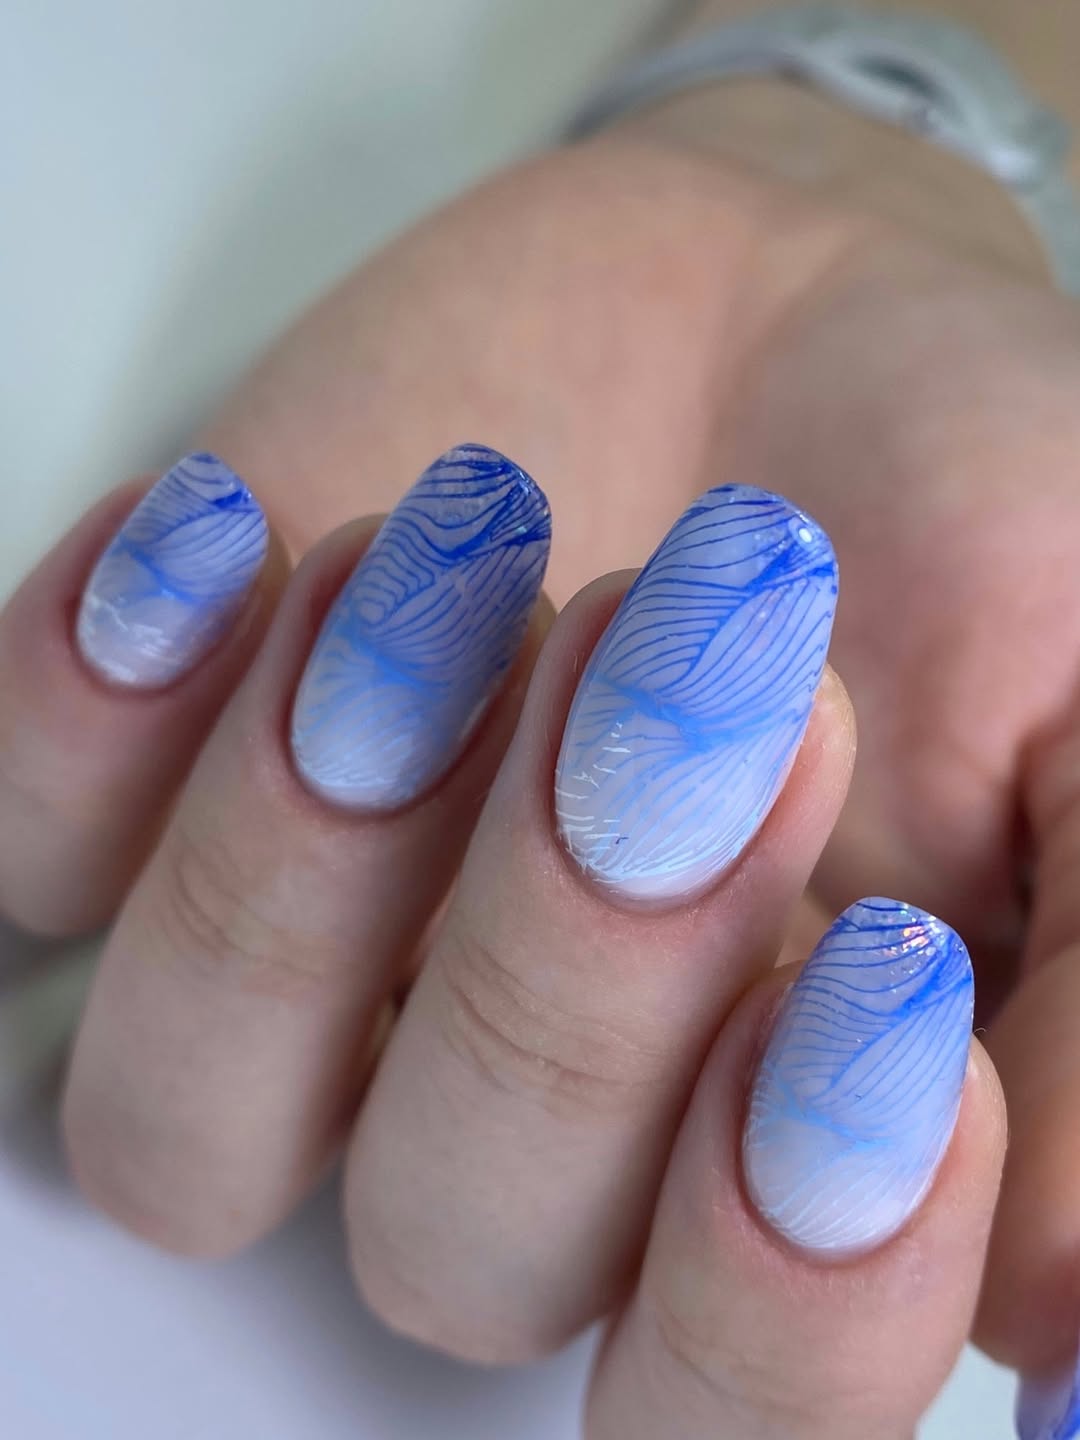
For a similar serene blue wavy line ombré in regular polish, you could try using a sheer milky blue like Essie’s “Strengthen & Color” line in “Sheer Fantasy” as your base, then hand-painting the waves with a slightly darker blue like ORLY’s “French Tip” using a fine art brush. Seal it all with a high-gloss top coat like Seche Vite for that smooth, ocean-like finish.
Ombrés generally wear well, but the wavy lines might show minor chips at the very edges of the design quicker than a solid color would, especially with regular polish which typically lasts 2-4 days without chipping. For gel, you can expect this design to last around 10-14 days. The longevity of the wavy lines largely depends on the precision of the top coat application, ensuring every edge is perfectly sealed.
19. Glossy Jet Black Short Squoval Nails
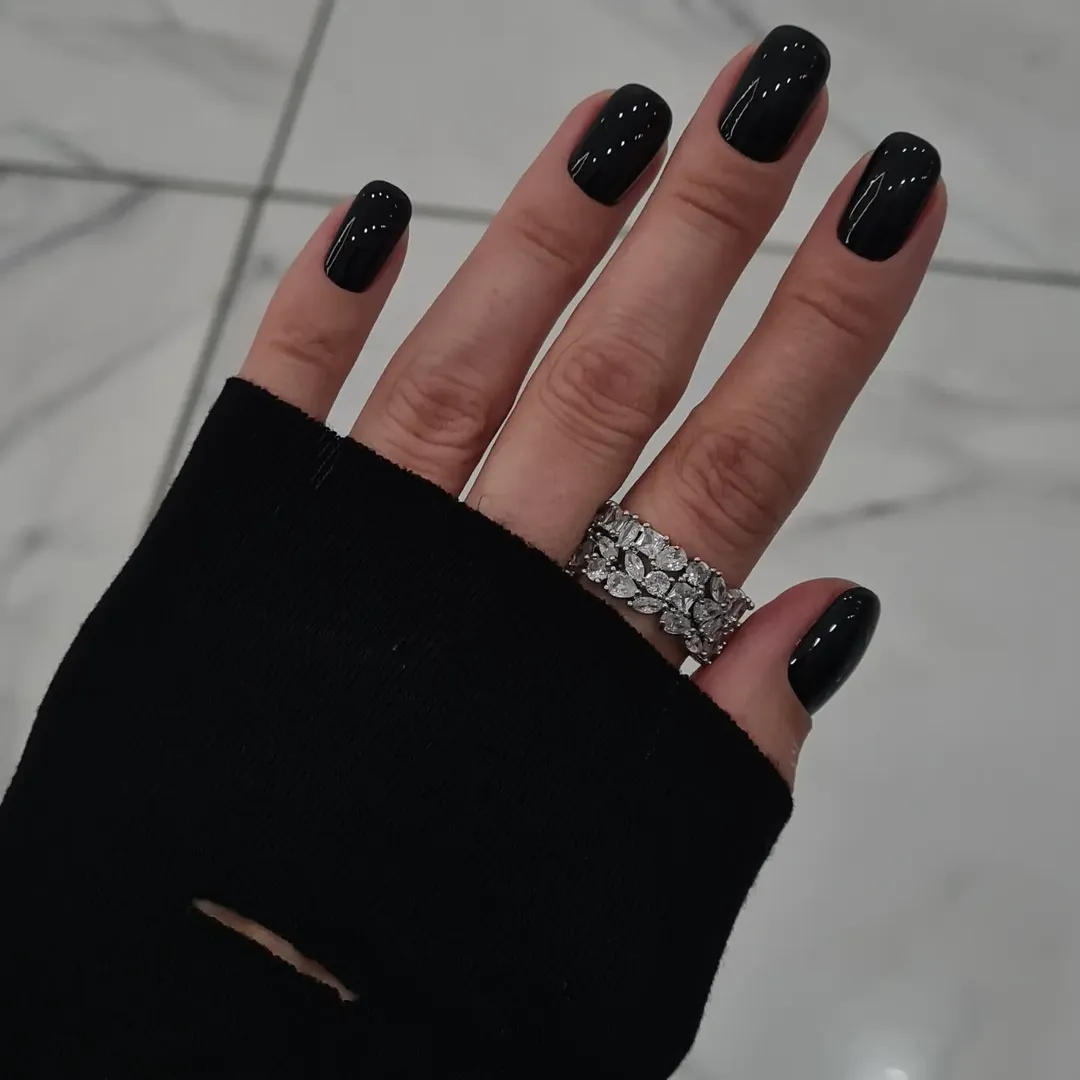
A glossy jet black short squoval manicure is the epitome of understated cool. It’s versatile enough for any occasion, from a formal event to a casual brunch, and transitions seamlessly from day to night. The short length makes it incredibly practical for any profession, including healthcare or those with hands-on jobs. It’s a confident, no-fuss choice that always looks put-together.
While bold colors come and go, jet black nails have a timeless appeal that always circles back into the trend cycle, often seen on runways and by celebrity manicurists like Tom Bachik. This season, it’s about embracing classic sophistication with a super high-gloss finish that makes the black truly pop. It’s less about edgy subculture and more about polished chic, a kind of quiet luxury nail moment.
20. Dreamy Pastel Lilac Glossy Short Square Nails
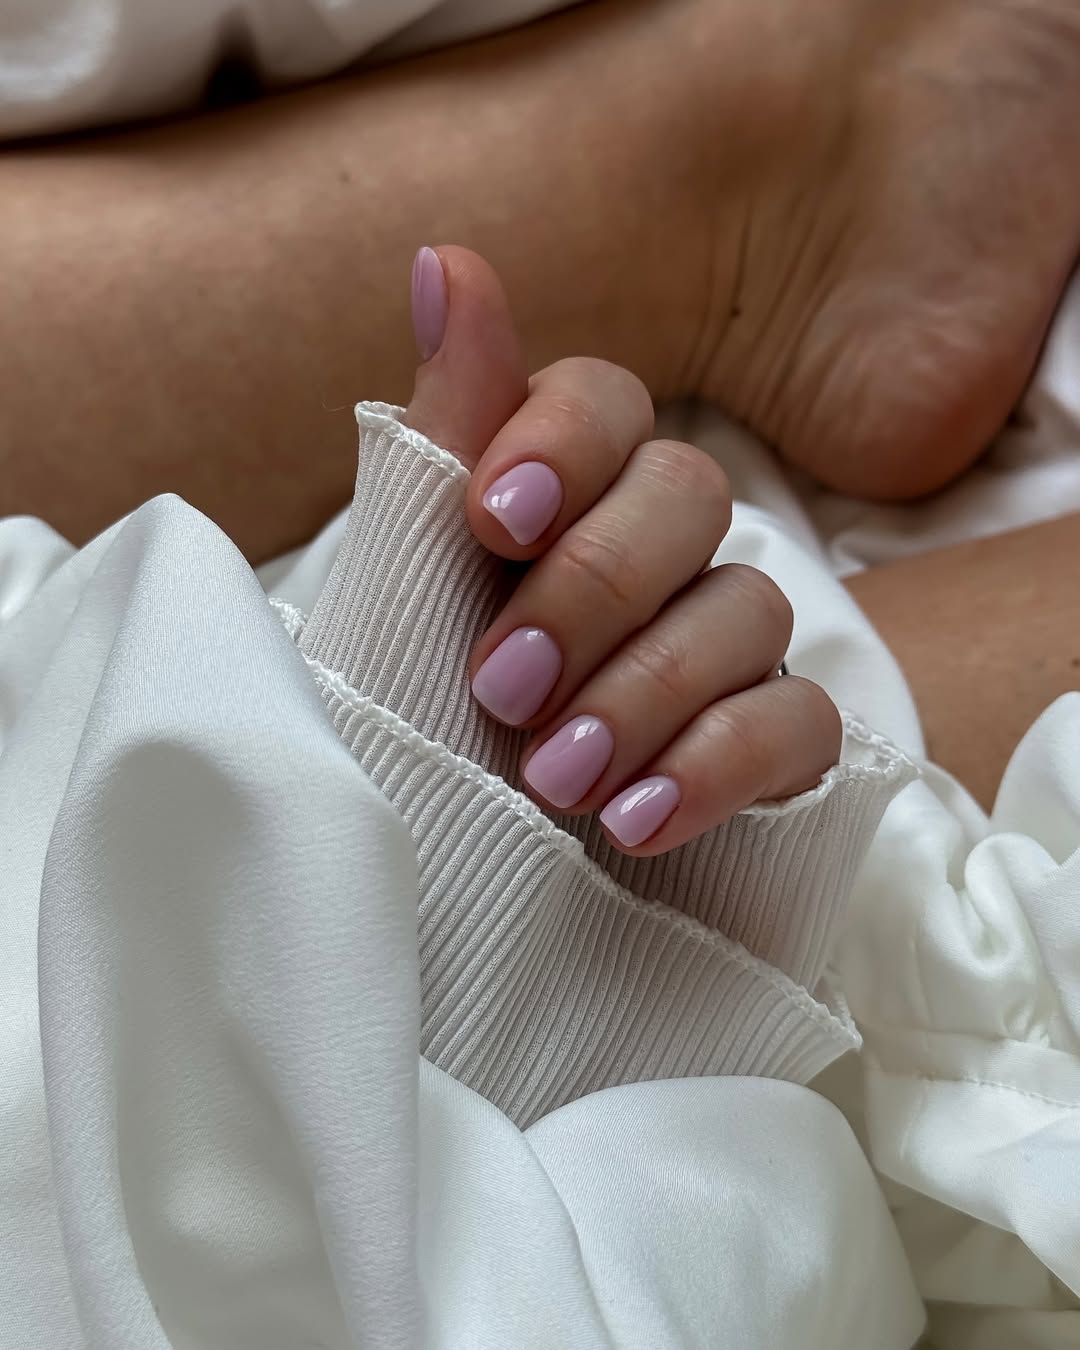
Short square nails are endlessly chic and suit almost every finger length and nail bed. This dreamy pastel lilac, with its subtle cool undertone, is particularly flattering on cool and neutral skin undertones, making the skin look brighter. If you have warm undertones, a slightly warmer lavender or a pastel with a touch more pink would be a great alternative to ensure it complements your skin beautifully.
- Base Coat: Gelish Foundation Base Gel (approx. $17)
- Pastel Lilac Gel Polish: DND Gel Polish “Soft Lilac” (approx. $10)
- Top Coat: Gelish Top It Off Sealer Gel (approx. $17)
- Lint-Free Wipes: Sally Hansen Lint-Free Wipes (approx. $5)
- Isopropyl Alcohol (91%): Any drugstore brand (approx. $3)
- 48W LED Lamp: OPI Gel Lamp (approx. $100)
21. Summer Lovin’ Milky Hearts Square Nails
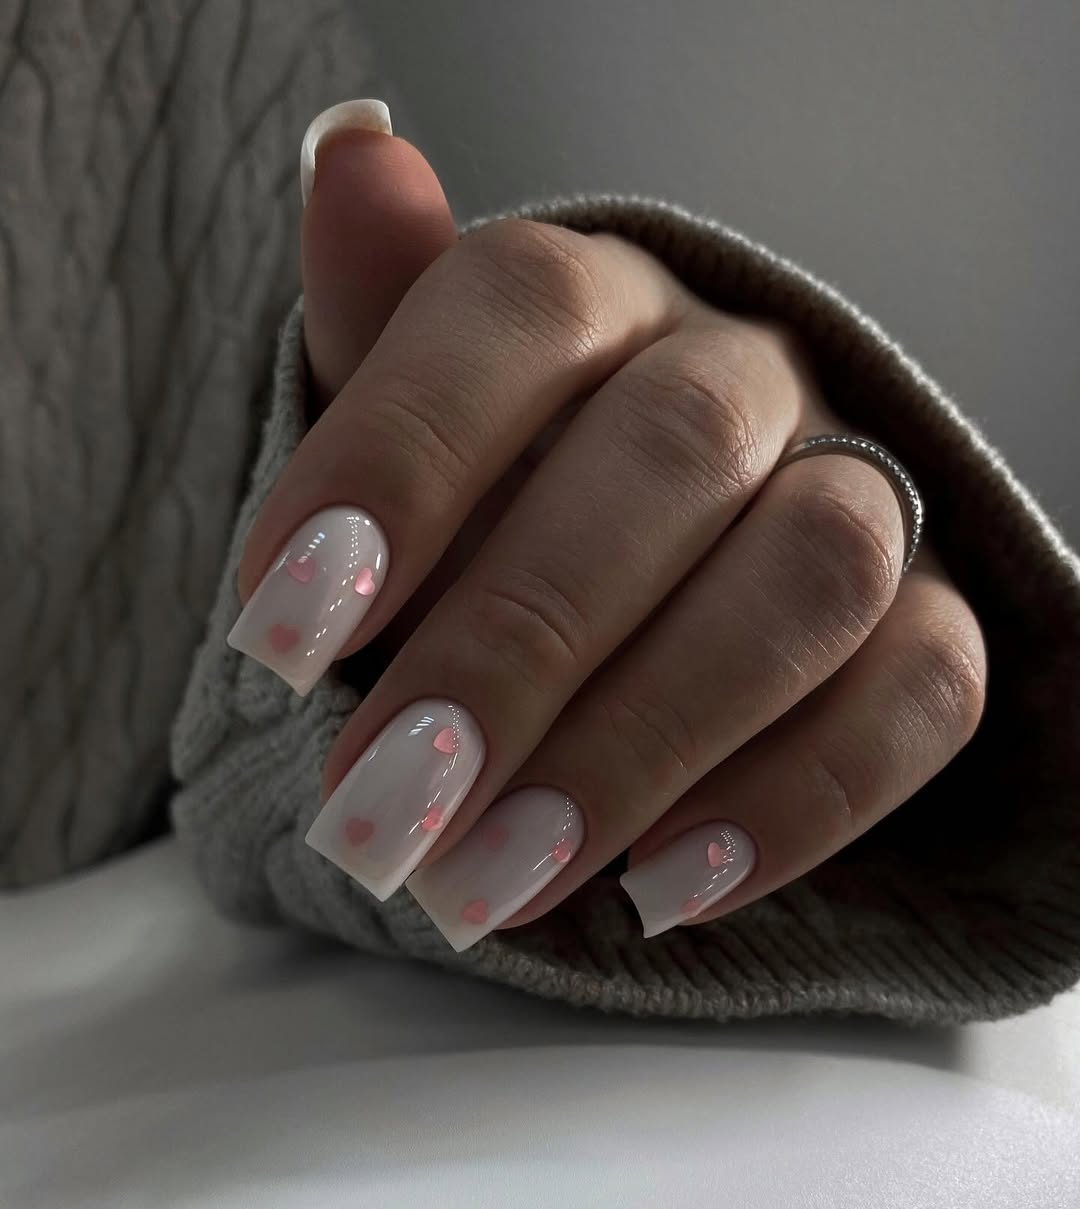
When placing delicate decals like these hearts, make sure your color coat is fully cured and wiped of any sticky inhibition layer first. Apply a thin layer of clear gel or top coat (without curing) where you want to place the decal. Carefully position the heart with tweezers, then gently press it down to remove any air bubbles. Cure for 30 seconds before applying your final top coat. This helps prevent the decal from lifting or wrinkling under the top coat.
For a similar milky white base with heart decals using regular polish, you can layer Essie’s “Marshmallow” (a sheer milky white) with small heart nail stickers available from brands like Kiss or Static Nails. Seal everything with a fast-drying, high-gloss top coat like Seche Vite to lock in the design and give it that super glossy finish.
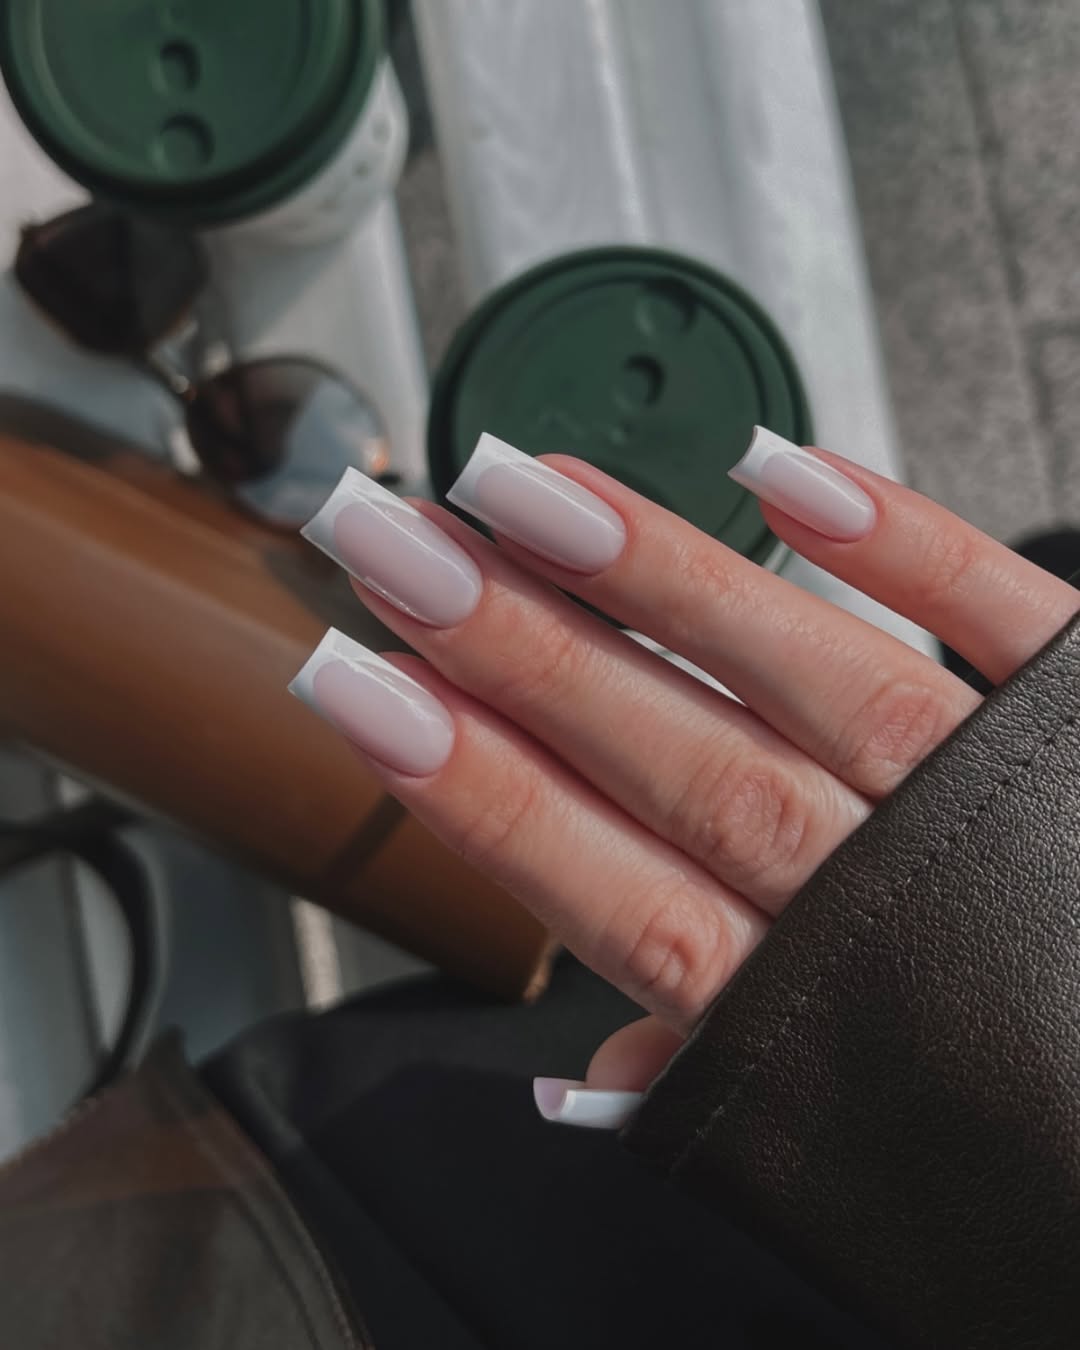
22. Classic White Square Tip French Manicure
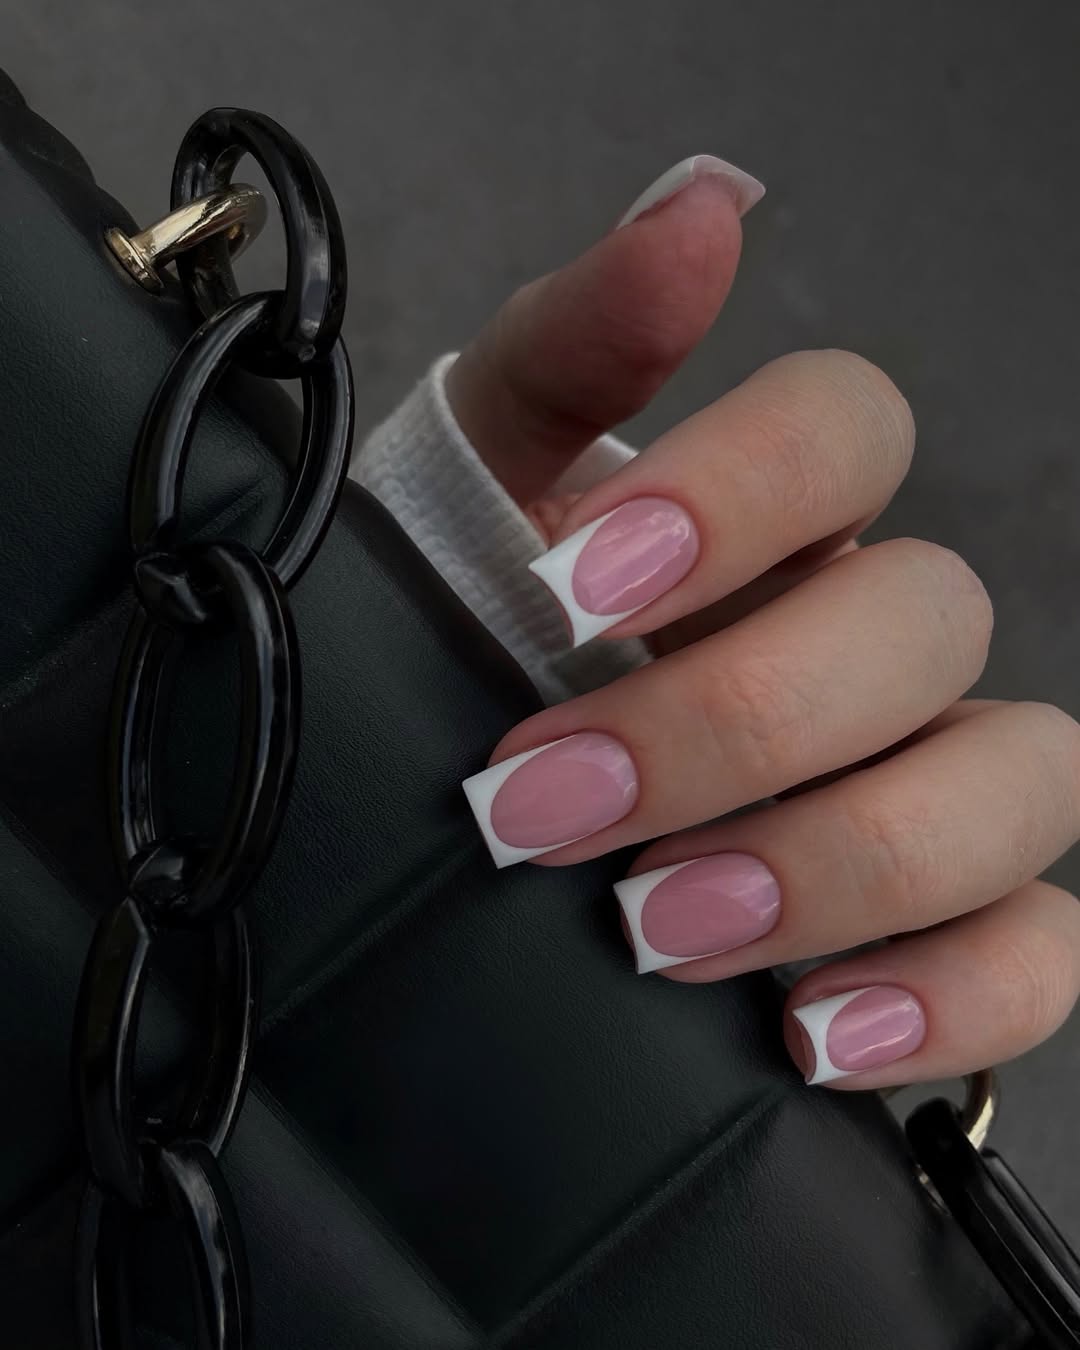
A classic French manicure, especially with a crisp white tip, needs proper application to prevent chipping at the free edge. If your base coat isn’t properly cured or if the white tip isn’t fully encapsulated by the top coat, you’ll see chips within days. Also, make sure to cap the free edge with every single layer – base, color, and top coat – to truly seal the manicure and protect it from daily wear and tear.
This classic look with gel can easily last 2-3 weeks, but regrowth at the cuticle will become quite visible after about 10-14 days due to the clear distinction between the milky pink base and your natural nail. With regular polish, a crisp French tip like this typically lasts 3-5 days before needing touch-ups or a full re-do, as chips at the free edge are more common.
23. Milky Shimmer Ombre Squoval Nails
The milky shimmer ombré is a nuanced take on the popular “glazed donut” nail and the ongoing demand for soft, pearlescent finishes. It’s trending because it offers a touch of glamour without being overtly glittery, a more refined sparkle that catches the light beautifully. This style has seen a boost through celebrity looks and Pinterest
24. Soft Yellow Ombré Glossy Square Nails
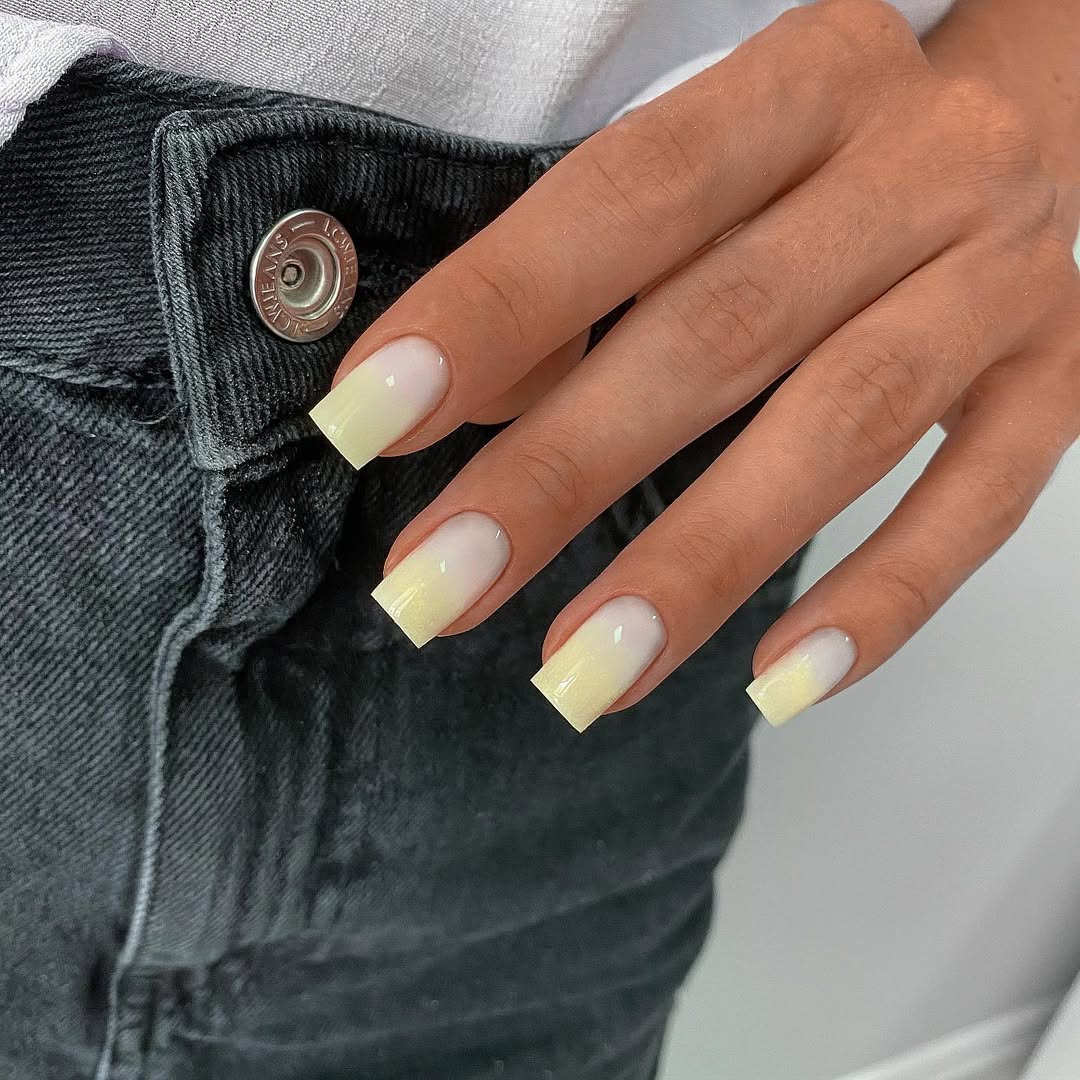
This soft yellow ombré is just perfect for summer brunches, picnics, or a relaxed beach holiday. The pastel hue is cheerful and light, complementing casual summer outfits beautifully. The medium square length is practical enough for daily activities but still feels polished and intentional. It’s an easy-going manicure that brings a sunny disposition without being too bold.
This particular soft yellow with a milky fade is incredibly flattering on warm and neutral skin undertones, enhancing a sunkissed glow. For those with cooler undertones, a slightly paler, almost lemon-chiffon yellow, or a yellow with a hint of white in the milky base, would provide a softer contrast and look equally radiant on your skin.
25. Black and White Cow Print Glossy Square Nails
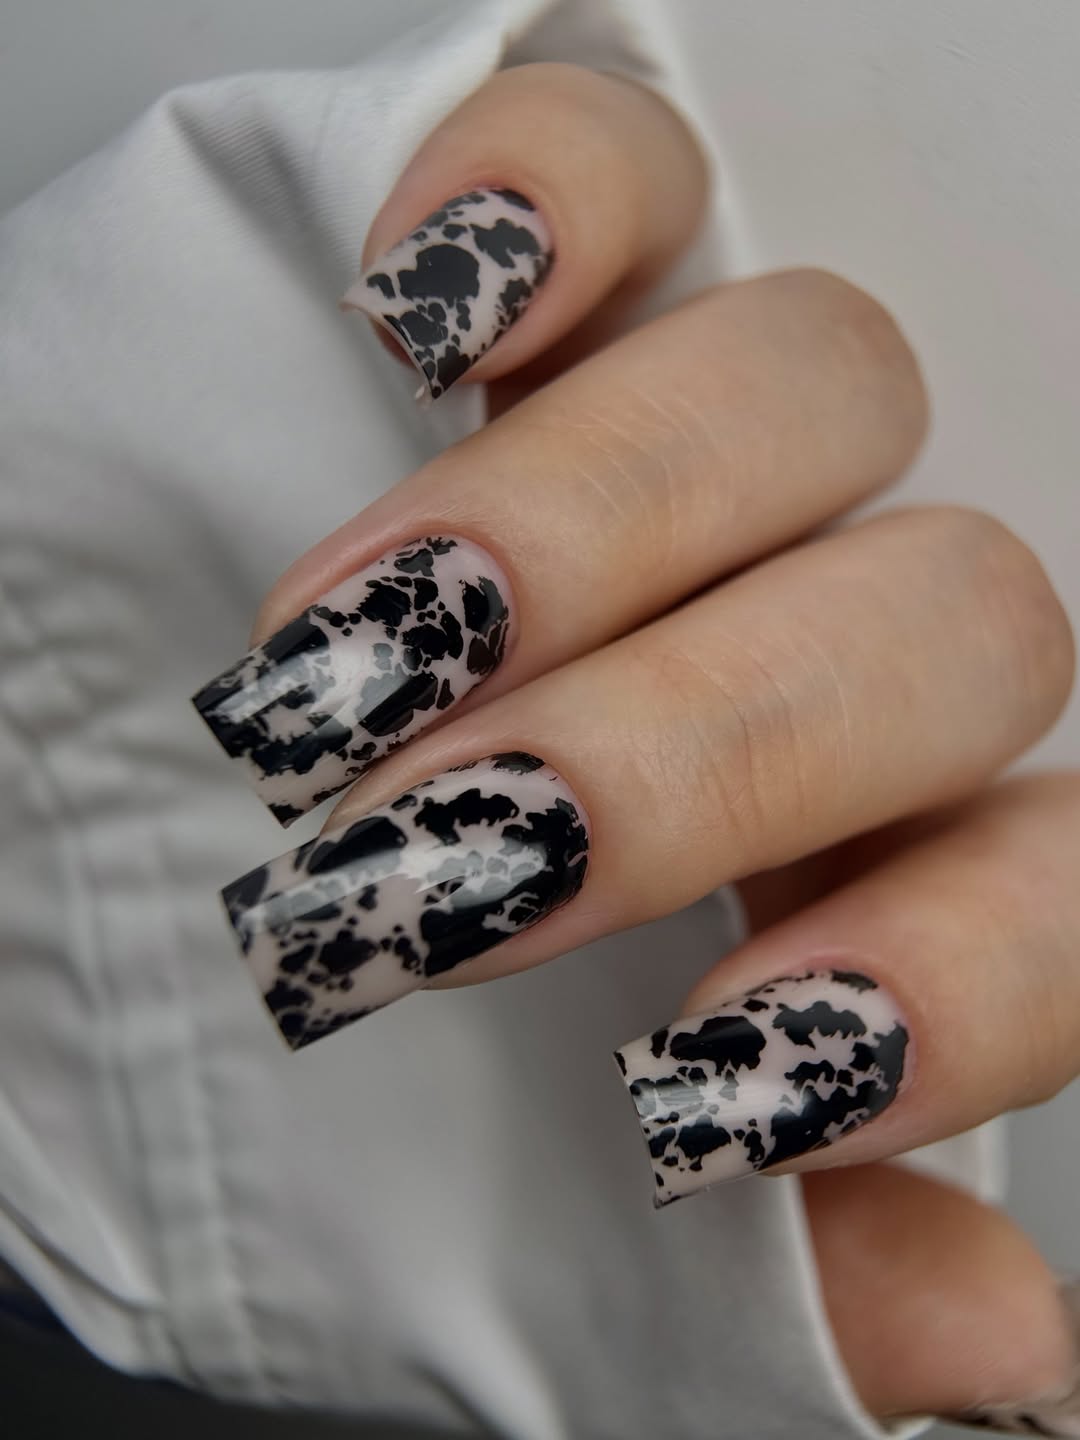
Creating crisp cow print requires a steady hand and layering. Here’s a quick guide:
- Apply a milky white base coat and cure for 60 seconds.
- Using a fine detail brush and black gel polish, paint irregular, organic “blobs” or patches on the nail, leaving white space between them. Don’t worry about perfection; cow spots are naturally uneven.
- Cure the black spots for 30 seconds.
- Using a very small amount of black gel, outline some of the existing black blobs with a thin line to add dimension.
- Cure for 30 seconds again.
- Finish with a glossy top coat and cure for 60 seconds.
The main concern with cow print, especially with gel, is preventing the black spots from bleeding into the white base. Ensure your base is fully cured and wiped of any inhibition layer before you start painting the black. Also, be mindful of how much black polish you load onto your brush; too much can cause it to spread and lose its crisp shape.
26. Dainty Polka Dot Square French Tips
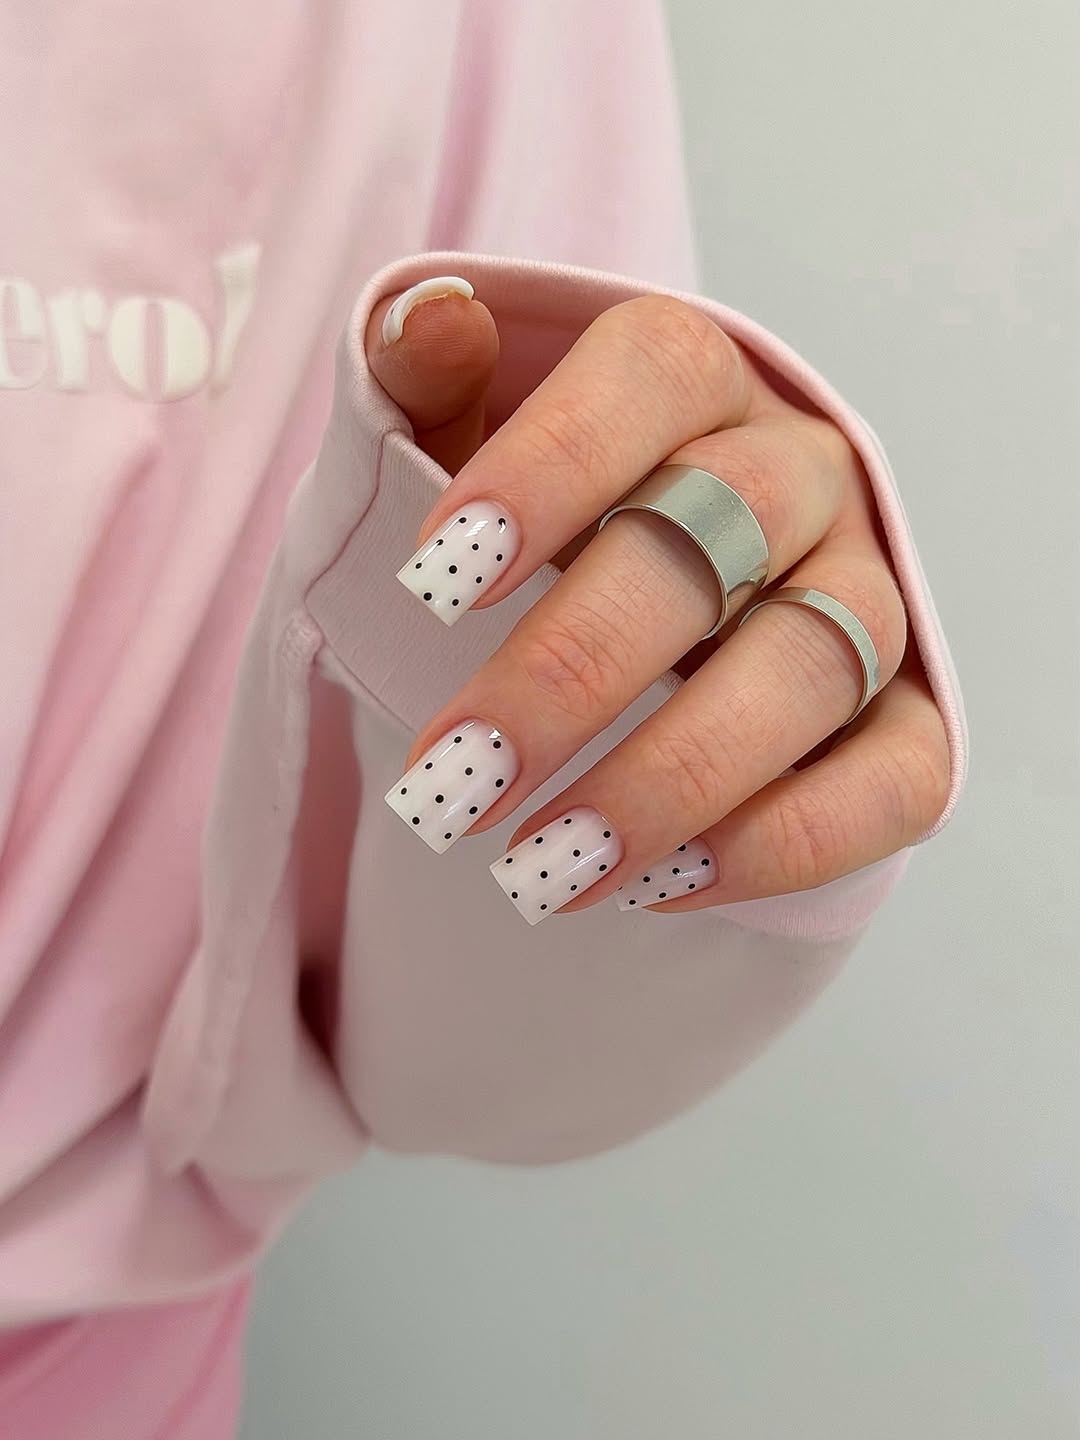
For a similar cool-toned nude jelly effect with regular polish that gives that clean, sheer look, try layering two thin coats of Essie’s “Sheer Pink” or OPI’s “Bubble Bath.” These iconic shades offer a translucent wash of color that’s perfect for a minimalist manicure, allowing your natural nail line to show through subtly.
The true hero product for a sophisticated jelly manicure is a builder gel or a soft gel overlay that has a slightly more viscous consistency. This allows for a smooth, thick application that creates that glass-like, rounded effect without looking bulky. Brands like Kokoist or Light Elegance offer excellent builder gels that are perfect for achieving this look.
27. Light Pink Polka Dot Glossy Square Nails
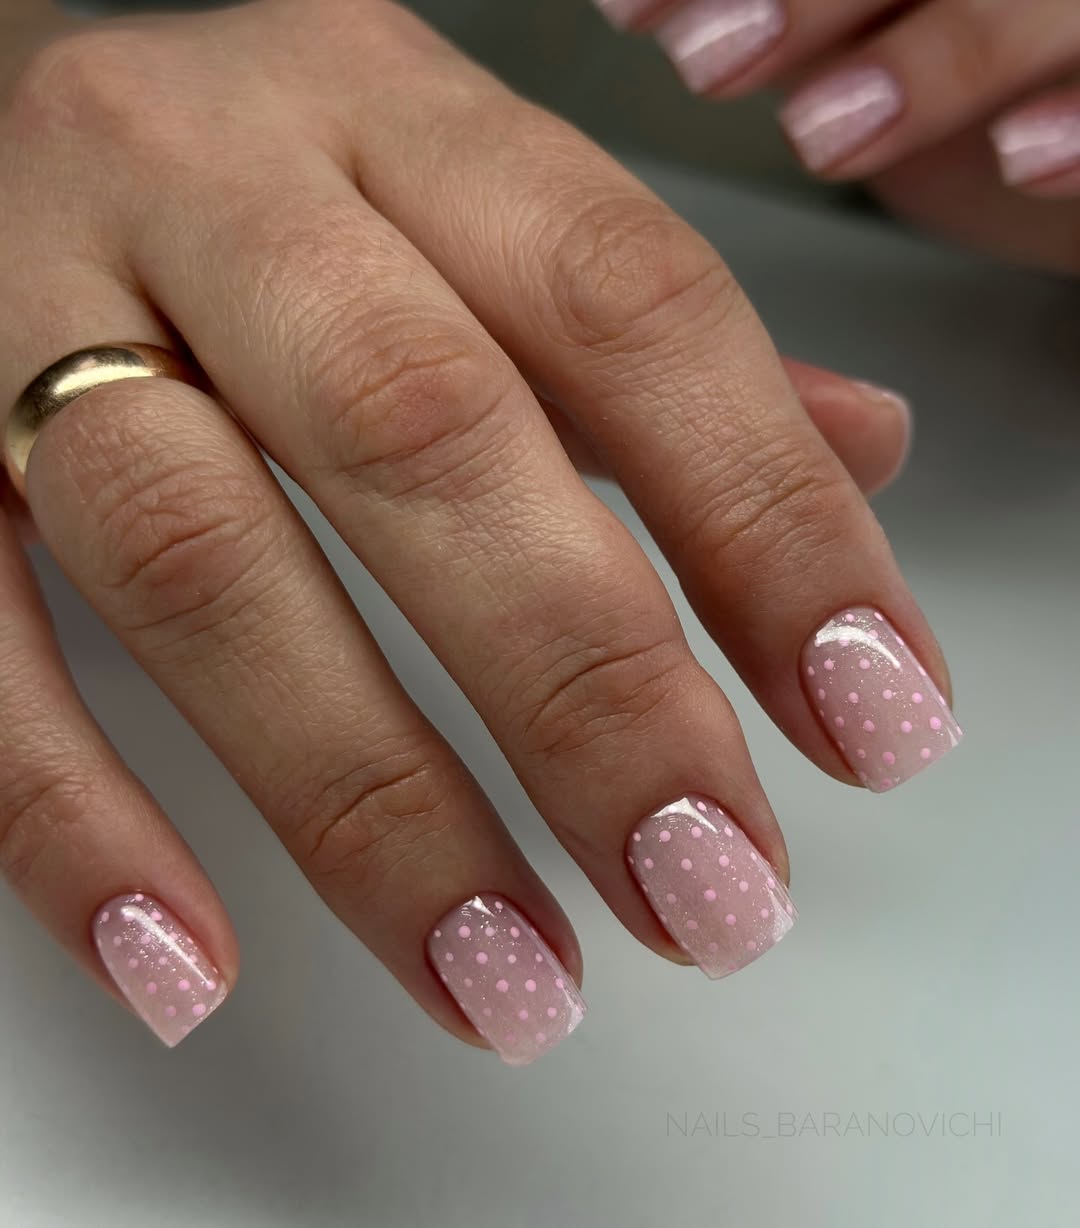
Polka dots are always fun, but with a regular polish, expect this look to last about 3-5 days before minor chips might appear, especially at the free edge or if you’re particularly hard on your hands. The shimmer top coat will help extend the life slightly and camouflage minor dulling. For longer wear, a gel overlay with encapsulated polka dots would easily last 2-3 weeks.
Playful, graphic elements like polka dots are having a moment, often seen in a fresh, unexpected way. While classic, this version feels very now—the soft pink keeps it delicate and summer-friendly, while the shimmer adds a touch of modern glam. It’s a chic nod to Y2K aesthetics that feels refined, not childish, fitting into the current wave of nostalgia-driven trends.
28. Soft Milky White Gold Leaf Accent Square Nails
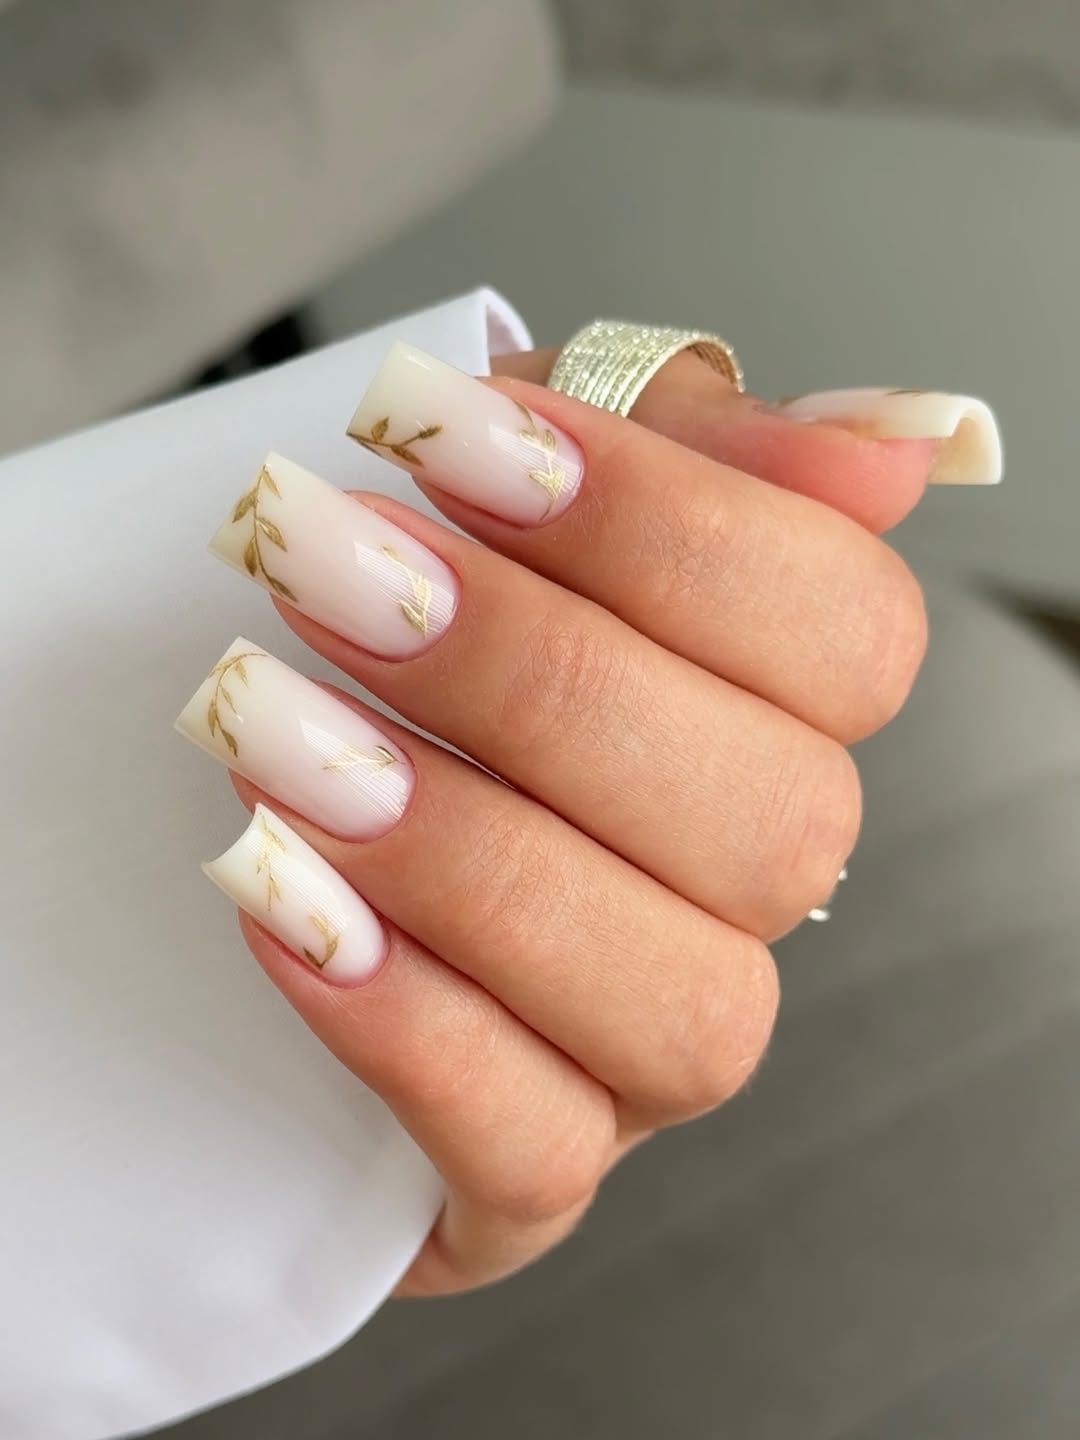
These milky white square nails with delicate gold leaf accents are the epitome of understated luxury, making them perfect for nearly any occasion. They’re chic enough for a wedding, professional enough for the office, and yet still feel special for a date night. The long square shape, while striking, can be a bit tricky if you’re frequently typing or working with your hands, so consider your daily activities if opting for this length.
The milky white base is a universal shade that flatters all skin undertones, offering a clean canvas. The touch of gold leaf especially brightens warm and neutral undertones, adding a subtle warmth. For cooler undertones, the gold still shines beautifully, creating a sophisticated contrast that looks incredibly high-end against a porcelain complexion.
29. Glossy Tortoiseshell Almond Nails With Gold Stars

Creating the tortoiseshell effect requires layering and blending specific shades:
- Apply a sheer nude or clear base coat and cure.
- Apply thin irregular blobs of sheer amber or caramel-colored gel polish. Don’t cure.
- Immediately apply smaller blobs of black or dark brown gel within and around the amber.
- Gently swirl the edges of the colors together with a detail brush to create a blurred, organic effect. Cure for 60 seconds.
- Repeat steps 2-4 for more depth, curing each layer.
- Add gold star decals by placing them on a tacky layer or using a dab of builder gel, then cure.
- Finish with a glossy top coat and cure for 60 seconds.
- Base Coat: Madam Glam Soak-Off Base Gel (approx. $15)
- Sheer Amber/Caramel Gel Polish: Gelish “Sweet Dreams” (approx. $12)
- Dark Brown/Black Gel Polish: Valentino Pure “Black Out” (approx. $14)
- Gold Star Nail Decals: Amazon Nail Decal Assortment (approx. $7)
- Detail Brush: MelodySusie Detail Brush Set (approx. $10)
- Top Coat: The GelBottle Inc. Extreme Shine Top Coat (approx. $20)
- 48W LED Lamp: Kiara Sky Beyond Pro Lamp (approx. $150)
30. Milky White Glitter Jelly Nails
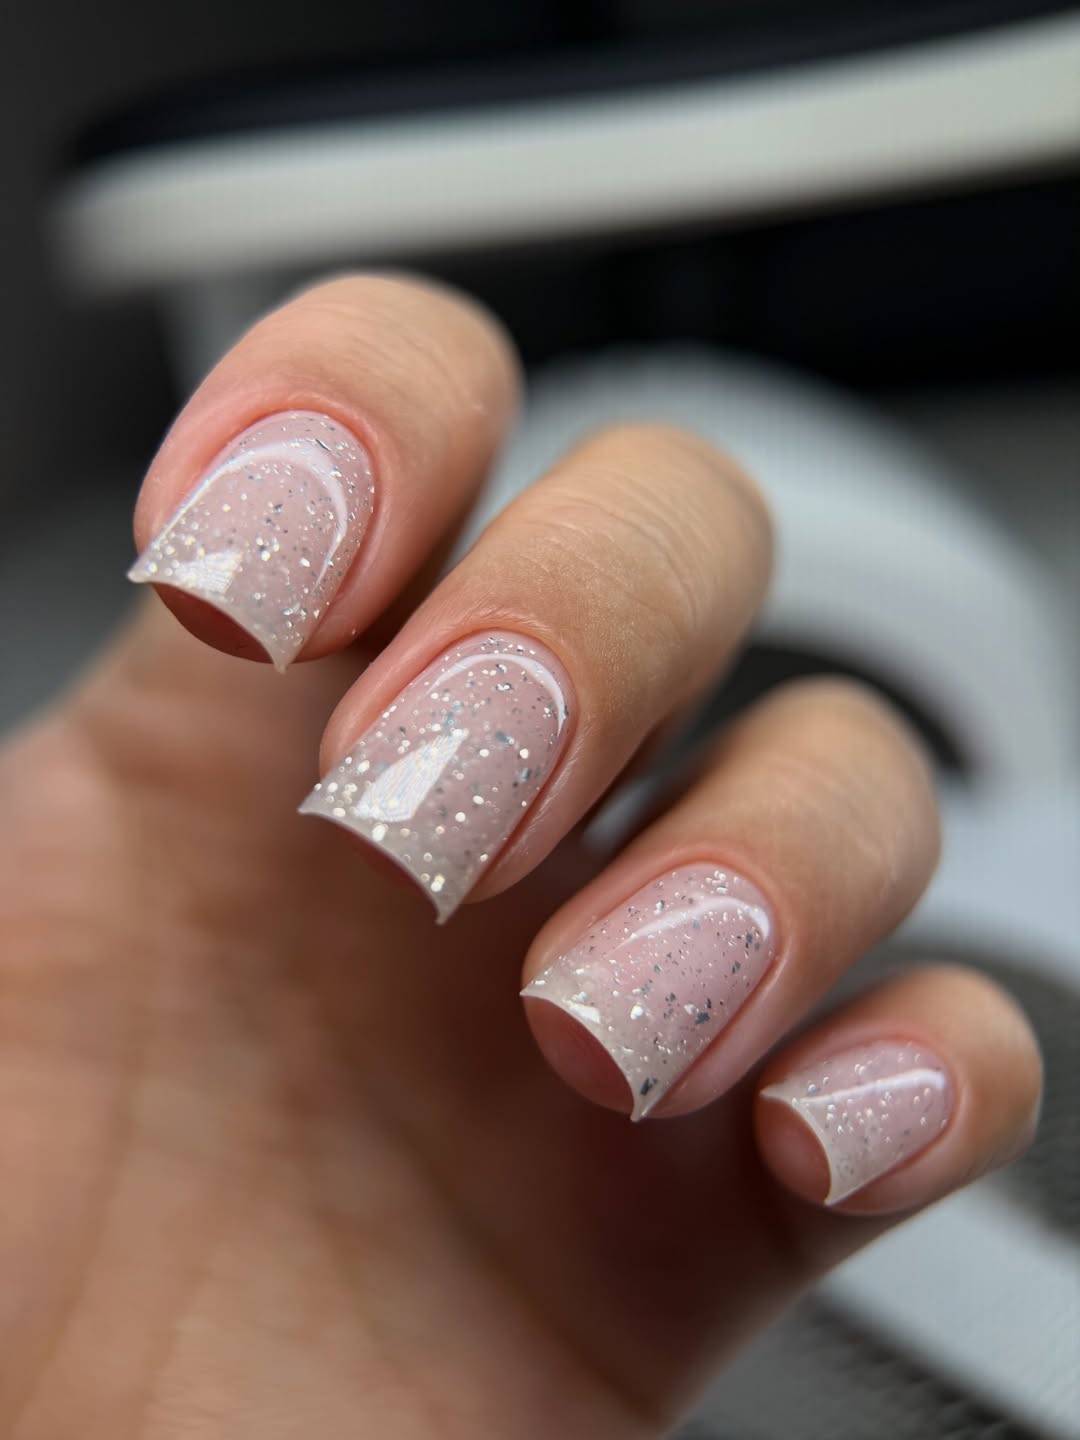
Jelly nails, when done with builder gel or a good quality soft gel, can last a solid 2-3 weeks before needing a fill or soak-off. The transparency helps to disguise minor surface scratches, but very visible chips will, of course, be noticeable. The glitter encapsulated within the jelly also helps diffuse any minor imperfections in the wear. Because of the sheer nature, regrowth at the cuticle will be more visible around the 1.5-week mark.
The main concern with jelly nails is ensuring proper and even application to avoid any lumpy or uneven spots, especially when encapsulating glitter. Gel can thicken and pull away from the free edge if applied too thickly, leading to shrinkage or a dull finish. Always apply in thin, even layers and cure thoroughly. Also, be mindful of HEMA allergies if you’re prone to sensitivities; many builder gels contain HEMA.
Ready, Set, Swirl! Your Summer Mani Guide
From whimsical swirls to understated gloss, these 30 nail ideas should provide plenty of fuel for your next manicure. Whether you’re heading to the salon or doing a DIY session at home, remember to have fun with your nails this summer. Don’t forget to save your favorite looks to your Pinterest boards for endless inspiration!